We Are the Music Makers Podcast
Victoria Boler
Music education philosophy, ideas, and teaching strategies
- Sound Before Sight in Elementary General Music
Music is an aural artform.
The notation is a way to preserve the sounds, but the notation of the music is not the music.
How can we teach elementary general music in a way that centers music as an aural artform, and focuses on hearing and understanding?
What is Sound Before Sight?
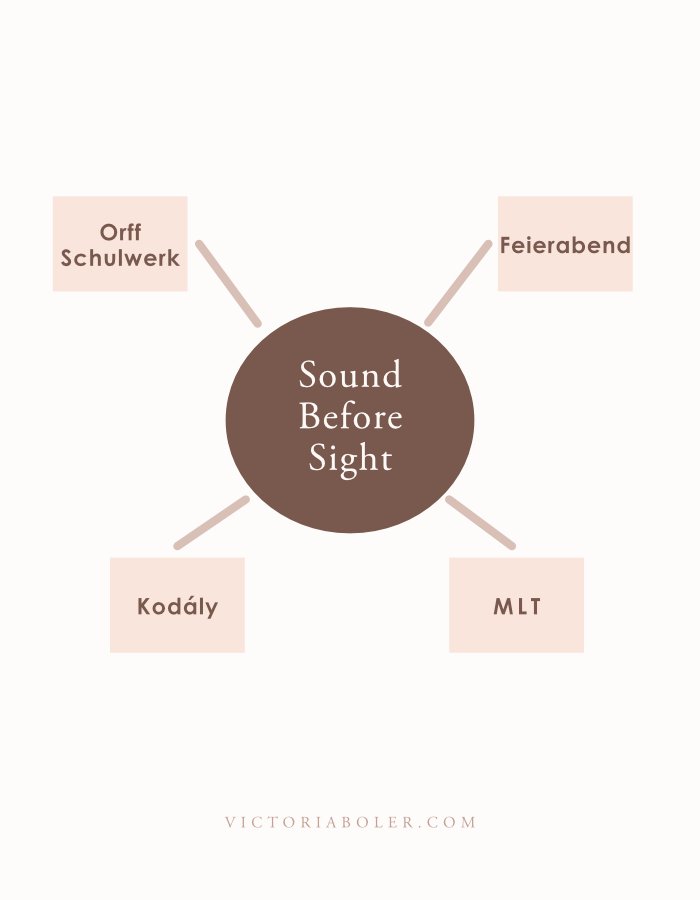
“Sound before sight,” or “sound before symbol,” or “sound-to-symbol” teaching is a principle many music education approaches follow, such as Orff Schulwerk, the Kodaly Concept, Music Learning Theory, Suzuki, and Feierabend.
With a sound before sight approach, we begin learning music through participatory interactions (listening, singing, speaking, playing, and moving) before we introduce visual notation and classroom vocabulary.
When notation is introduced, students have already built the meaning of the notation through experiences.
Learning Music Like a Language
Sound before sight is the way students learn to read a language, and while music is not a language, we can learn it the same way.
When a child is learning how to read, they have many years of experience just hearing language all around them. They also have years of speaking, and having interactive conversations in that language. When it is time for children to learn to read and write, they have an aural and oral context for the written language.
Imagine if we had children wait to speak until they could read and write. Imagine if children were only allowed to speak and have conversations using words they could read and write orthographically.
In the same way, we want young musicians to have time to interact with the aural and oral transmission of music in a true way before we add an unknown visual. We can use the sound before sight approach to emphasize musical experiences that lay a foundation for notational literacy.
Learning to hear vs to read: Is Sound Before SIght still Relevant?
To me, there’s something magical in sound-before-sight which I think makes it highly relevant in today’s music programs: this approach is much more about learning how to hear rather than learning how to read.
The emphasis is on developing students’ aural skills, which will serve them well in any field of music. Regardless of which musical pathway students end up on outside of class, the ear training as the foundation of the sound-to-sight approach will be useful.
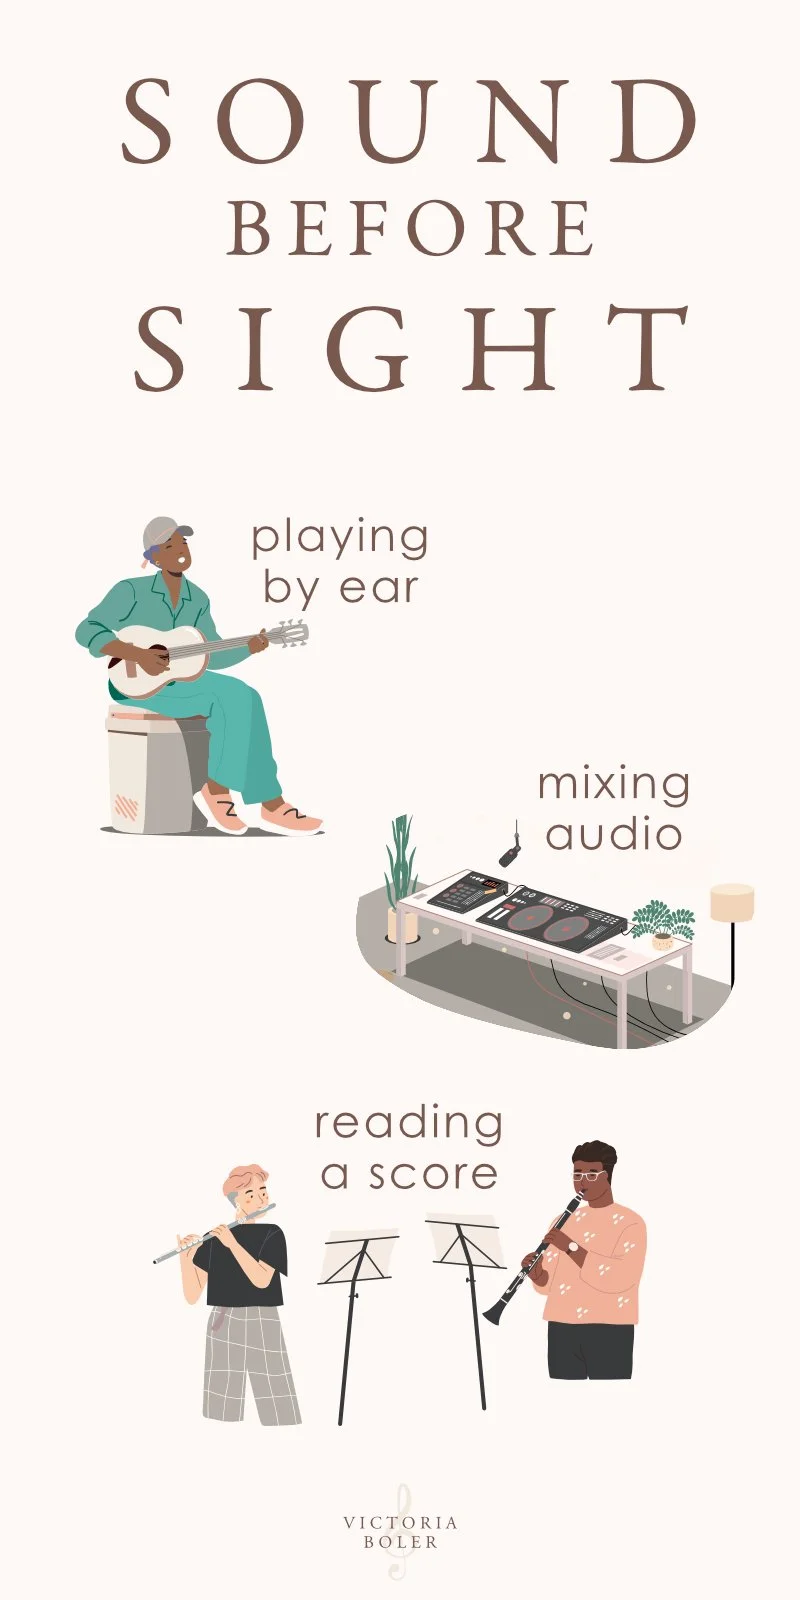
When students engage in something like informal learning processes, they’ve developed the aural discrimination to hear a song and learn it by ear, or read a chord chart. If they go on to be an audio mixer, they’ve honed their aural sensitivity to specific musical qualities of each track. If they go on to be an instrumentalist playing a film score reading standardized Western notation, they have the aural training and a way to mentally link the aural event to a visual representation.
To me, this approach is highly useful and very relevant because it develops aural skills and analytical thinking that students can employ in any field of musicing.
Learn more about the National Standards for Music Education
Pestalozzi and Sound Before Sight

The importance of a “sound before sight” approach was developed through the work and followers of Heinrich Pestalozzi. Pestalozzi was a Swiss educator in the 18th and 19th century. He believed in the importance of experiences and sensory-based learning, called Anschauung.
In music education, our use of this principle has evolved from its early use in American public schools which focused primarily on singing and vocal development as the entirety of the school music program.
Today Pestalozzi’s principle continues to be applied differently in music programs with music education approaches such as the Kodaly concept, Orff Schulwerk, and Music Learning Theory.
Sound Before Sight Examples:
Experience First
Pestalozzi advocated that children should learn through direct, concrete experiences. This experiential education focused on “Anschauung,” or sense intuition, and learning through observation, exploration, and hands-on activities.
In this constructivist model, the student is an active participant in their own learning, as opposed to a passive participant who receives information from the teacher.
What Does Experience First Look Like in Music Education?
In practice, we can think of sound before sight as actually active experience before sight.
In this approach to teaching and learning music, we center learning experiences around active musicking. That is, active involvement in musical tasks like singing songs, speaking rhymes, playing games, playing instruments, and moving.
The way to learn music is through musicking - embodying musical experiences. Musical comprehension is built in an active embodied experiential context.
When it’s time to actually pull musical knowledge from these experiences, we need a place for the melodic or rhythmic or form or textural understanding to live aurally.

Experience Example 1: Apple Tree Game
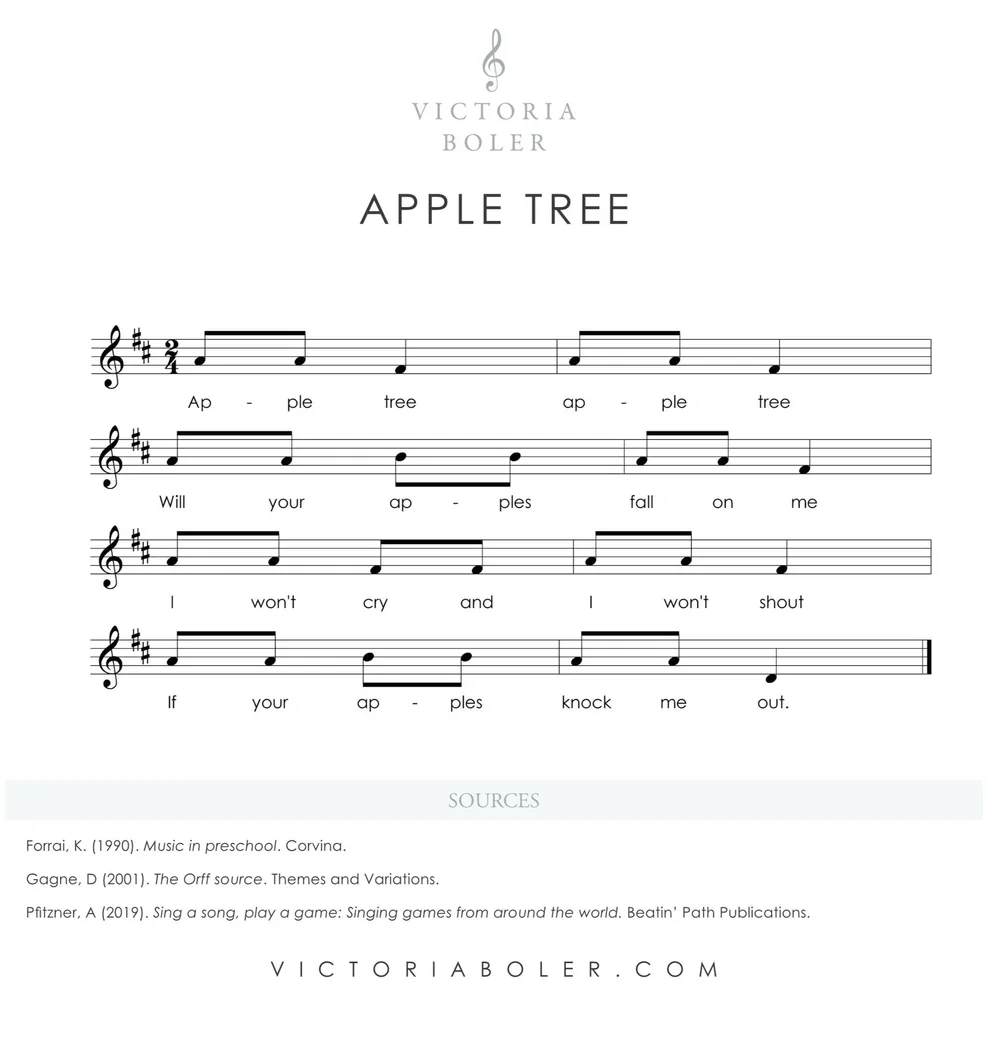
This is one application out of many possible uses of sound before sight: let’s imagine that in 1st grade we want to teach a tritonic melody, in this case sol, la, mi.
Instead, we’re going to start with an active experience - in this case, a singing game.
Directions:
There are many different versions of this singing game!
In the one I use, two students connect their hands above their heads to create a tree. The rest of the class walks in a circle under the tree while they sing the song.
At the end of the song, the players creating the tree lower their branches and capture one student. That student becomes an additional tree with the teacher and the game begins again. Each round of the game creates more and more trees.

Experience Example 2: Vocal Improvisation
We can also use improvised singing conversations to experience sol, la, mi without using those names.
Singing the question with a sol, la, mi melody, we’ll ask students what they would do with all the apples that fell from the tree.
Students sing their responses back with a sol, la, mi toneset. Examples might be, “I would take them to my grandma,” or “I would share them with you,” or “I would peel them,” etc.
At this point in the teaching and learning process, students are using the toneset to sing, move, and improvise. Our emphasis is on creating contextual musical experiences.
Sound Before Sight Examples:
Known to the Unknown
Interconnected to the idea of experiencing first, another central belief from Pestalozzi that we use today is moving from the known to the unknown. Pestalozzi believed that Anschauung needed to be experienced before the key word in the lesson was used.
Moving from the concrete to the abstract, and the familiar to the unfamiliar, learning begins with an existing set of knowledge and experiences. We use those existing sets of knowledge and skills to make comparisons and connections to new things we encounter. We use our known informational landscape to investigate an unknown element.
What Does Known to Unknown Look Like in Music Education?
We want student musicians to link known musical concepts to new musical sounds.
Using this strategy of known to the unknown, students figure out new rhythmic and melodic elements by first categorizing them into what they are not. Does the melody go higher than the pitches we know? How much higher? How much lower? We can hear that a piece of melodic information is missing because we compare the new sounds to known sounds.
The sequence we use becomes the set of known musical concepts students will compare new musical sounds to.
Learn more about a Scope & Sequence for elementary music here

Known to Unknown Example 1: Aural Decoding
Let’s imagine we want students to aurally identify a new pitch higher than their known pitches, sol and mi. This is where we will link the new sound (la) to the known sounds (sol and mi) and where our musical sequence is so useful.
Sing the song and play the game to Apple Tree
Standing still, sing the first four beats on a neutral syllable while “painting” the melody (tracing the melodic contour in the air)
The teacher sings the question with a sol mi toneset: Those sound like pitches we know. In this class, what do we call them? (sol and mi)
Sing the first four beats on solfege with body solfege signs or Curwen hands signs
Sing the next set of four beats on a neutral syllable while “painting” the melody
Were all of those pitches sol and mi? (no) What was different about that melody? (answers may be divergent - the melody went higher)
Sing the first eight beats on a combination of solfege and a word students choose to describe the new pitch, like “up,” “sky,” etc.
Sol sol mi, sol sol mi, sol sol up up sol sol mi

Known to Unknown Example 1: VIsual Representation
Students have analyzed the melody and found a new high pitch in the phrase.
At this point they might link the new sound to a visual representation of the sound.
Looking at the board, students work with a shoulder partner to decide which image shows the melody most accurately. Students show their answer by holding up a 1 or a 2, then turn to a shoulder partner and discuss their answer.
Other Ways to Visually Represent a Melody
There are so many more options for visually representing a melody in a sound-to-sight model!
Here are a few extras to consider….
Students can trace the melodic contour in the air. (They’ll do this without the teacher’s assistance.)
Students can place manipulatives like small erasers or Lego blocks to show the melodic contour on the floor in front of them.


Students can use a pencil to write the melodic phrase above the words of the text in an exit ticket. (When I do this, I also like to ask students why they chose to write the melody the way they did.)
Students can help the teacher or another student drag the target pitch higher or lower on the board by pointing up or down. Here are a few examples of what that can look like with la, do, and re:
After these interactions, students have (1) used the new pitch in a singing game (2) improvised with the new pitch (3) aurally identified the new pitch, and (4) notated the new pitch.
When the teacher introduces the classroom vocabulary for the new pitch, la, and how to write it on the staff, students have already constructed what the new solfege pitch means in a melody.
Sound Before Sight in Music Education
This experiential process allows students to connect musical components like melodies, rhythms, and dynamics with their existing auditory experiences. As a result, students develop a solid foundation in aural skills because they internalize music before they encounter its visual symbols. Whether those symbols are in the form of chord charts, tablature, the Nashville Number System, or standardized Western notation, sound before sight helps students interpret notation meaningfully when the time comes.
3 July 2024, 10:22 am - Picture Books to Sing in Kindergarten Music Class - From Epic Books
Here is a list of books to sing from Epic Books! At the time of this post, all these books are live, and available on the free plan.
This is an accompaniment post to this podcast episode about how to create activities around picture books.
Let’s get singing!

Singing Books about Animals, Insects, and Arachnids


Cat Goes Fiddle-I-Fee
By: Harriet Ziefert
Illustrated by: Emily Bolam
This cumulative song is so fun to sing! Throughout the story we collect more and more animals, making our song longer and longer.
The Itsy Bitsy Beetle
By: Artie Bennett, Wes Magee
Illustrated by: Tomislav Zlatic
After Itsy Bitsy Spider goes up the waterspout, Itsy Bitsy Beetle has his own adventure in the snow!
The Itsy Bitsy Spider
By: Scarlett Wing
Illustrated by: Rob McClurkan
Scarlett Wing extended the story of The Itsy Bitsy Spider to be a tale about perseverance. At the end of each page the author wonders if Itsy Bitsy Spider goes up the spout again… read to find out!
Mary Had a Little Lamb
Illustrated by: Hazel Quintanilla
Quintanilla has a knack for reimagining the story of children’s songs through her illustrations. In this classic song and nursery rhyme, Mary is a lamb herself, going to a school run by a hen and playing with bunny, bear, and dog friends.
Oh Where Oh Where Has my Little Dog Gone
Illustrated by: Hazel Quintanilla
This song is well-loved by many children already, but Quintanilla gives it a new story with the illustrations. Join a loveable family of dogs as they play a fun game of hide-and-seek. Where could the little dog be?
Over in the Meadow
Illustrated by: Jill McDonald
This is one of my all-time favorite books to sing! I love using it on the first day of school. Students quickly pick up on the call-and-response form of the dialogue.
The Wheels on the Bus
By: Scarlett Wing
Illustrated by: Jannie Ho
This classic children’s song gets a fun twist from author, Scarlett Wing! In this version step on the bus with circus animals, and sing all through the town.
Sing a Book Up in the Sky


Star Light Star Bright
By: Artie Bennett, Melissa Everett
Illustrated by: Oksana Pasishnychenko
This book extends the classic nursery rhyme, adding different things a parent wishes for their child.
In the classroom, we can choose a few pages to sing together, then students can take turns singing their own wishes.
Twinkle Twinkle Little Star
By: Ann Taylor and Jane Taylor
Illustrated by: Katherine Duffy
Duffy illustrates the classic text of “Twinkle Twinkle Little Star” by sisters Ann and Jane Taylor. This is a great opportunity to introduce students to the poem’s full text!
Twinkle Twinkle Little Star
By: Scarlett Wing
Illustrated by: Stacy Peterson
Author Scarlett Wing adds charming additional verses to this well-loved children’s song. Each page is set in a different children’s story: Little Red Riding Hood, Cinderella, Jack and the Bean Stalk, etc.
Sing a Story about Nature


Jack and Jill
Illustrated By: Hazel Quintanilla
Hazel Quintanilla has illustrated several books in this collection! This is the classic text of Jack and Jill, acted out by two adorable mountain goats.
I Love the Mountains
Illustrated By: Haily Meyers
Speaking of mountains, Haley Myers set the classic song, ‘I Love the Mountains” to beautiful illustrations in this book! In addition to singing the song, we can also consider creative movement opportunities by asking students to act out the different scenes in the book: mountains, meadows, water, etc.
Sing About Water


There’s a Hole in the Bottom of the Sea
By: Jessica Law
Illustrated by: Jill McDonald
Jessica Law took a different spin on this classic children’s song! This time, Law uses each new verse to sing about a different animal: snail, squid, shark, etc., and each new animal has a different place in the food chain of the ocean!
Rain Rain, Go Away
By: Melissa Everett
Illustrated by: Carrie Wendel
In this book, children start the song by singing about how they wish the rain would go away so they could play outside. By the end of the book, the children realize they can play outside in many different kinds of weather! They decide the rain can stay after all.
Down by the Bay
By: Kim Mitzo Thompson, Karen Mitzo Hilderbrand
Illustrated by: Roberta Collier-Morales
This is a well-loved children’s song, and such a fun way to work on echo singing! Collier-Morales illustrated the book cumulatively, so each time we sing about a character, they stay on the page. By the end of the book, we have collected a host of silly characters down by the bay.
Down by the Bay
By: Kim Mitzo Thompson, Karen Mitzo Hilderbrand
Illustrated by: CIA Students
This second installment of “Down by the Bay” is only slightly shorter than the first version, which is great for classes where we are short on time!
Books to Sing On the Farm


A Farmer’s Life For Me
By: Jan Dobbins
Illustrated by: Laura Huliska-Beith
While this isn’t technically a book to sing, the rhyming text is delightful. Dobbins added the repeated refrain, “1 2 3 it’s a farmer’s life for me” throughout the book. Take this opportunity to compose a simple melody to this repeated phrase and have students sing it with you!
Old MacDonald had a Farm
By: Kim Mitzo Thompson, Karen Mitzo Hilderbrand
Illustrated by: Patrick Girouard
The classic! Sing this lively and well-loved song at the end of class, and then consider exploring the variations listed below.
Old MacDonald Had a Band
By: Scarlett Wing, Dan Taylor
Illustrated by: Dan Taylor
Students may already know that Old MacDonald had a farm… but do they know about the band? Join these animals as they get ready to put on a show at the end of the book. In a future reading, consider talking about what students notice about the book, and how the instruments make sounds.
Old MacDonald Had a…. Zoo?
By: Iza Trapani
Iza Trapani has several delightful children’s stories to sing, and luckily for us, this one is available on Epic Books! In this story, students follow Old MacDonald as he tries to go about his day, taking care of his cow as well as his kangaroo, elephant, zebras, and more!
Singing Books About People


Diddle Diddle Dumpling
By: Melissa Everett
Illustrated by: Imodraj
After John goes to bed with one shoe off and one shoe on, we learn about other children in this nursery rhyme adapted by Melissa Everett.
I Know an Old Lady Who Swallowed a Fly
By: Alan Mills, Rose Bonne
Illustrated by: PisHier
In this silly (and somewhat morbid) children’s classic, the old lady swallows a fly and proceeds to swallow a host of other animals.
This Old Man
By: Kim Mitzo Thompson, Karen Mitzo Hilderbrand
Illustrated by: Laura Ferrar-Close
Students will love helping us count to ten as we tell the story of an old man who loves to play his rhythm sticks all over town! This is a great story to lead into or out of another rhythm stick activity in class. Students can also quickly pick up the repeated refrain at the end of each page and sing along.
Bonus: Sing a Book About a Beat!

We Got the Beat
By: Charlotte Caffey
Illustrated by: Kaitlyn Shea O'Connor
This book deserves to be in a category all on its own!
The text of the Go-Go’s song “We Got the Beat” is set to lively illustrations. Read the book, then sing along with the recording and move!
1 July 2024, 10:05 am - Upper Elementary Music Games
Singing games are a beautiful way to increase student participation and teach musical skills in any grade level!
When we choose games for upper elementary students, we can look for engaging and active games that incorporate competition in a student-friendly way.
Let’s look at examples of singing games that upper elementary students love: Deedle Deedle Dumpling, Doña Araña, Vamos a Jugar, El Florón, and Big Fat Biscuit.
Then, we’ll explore two research studies about singing games in upper elementary music. These two studies can help us frame why these games are so important to students in this age group, and they can have implications for the way we approach learning activities for upper elementary students in general.
Let’s sing!

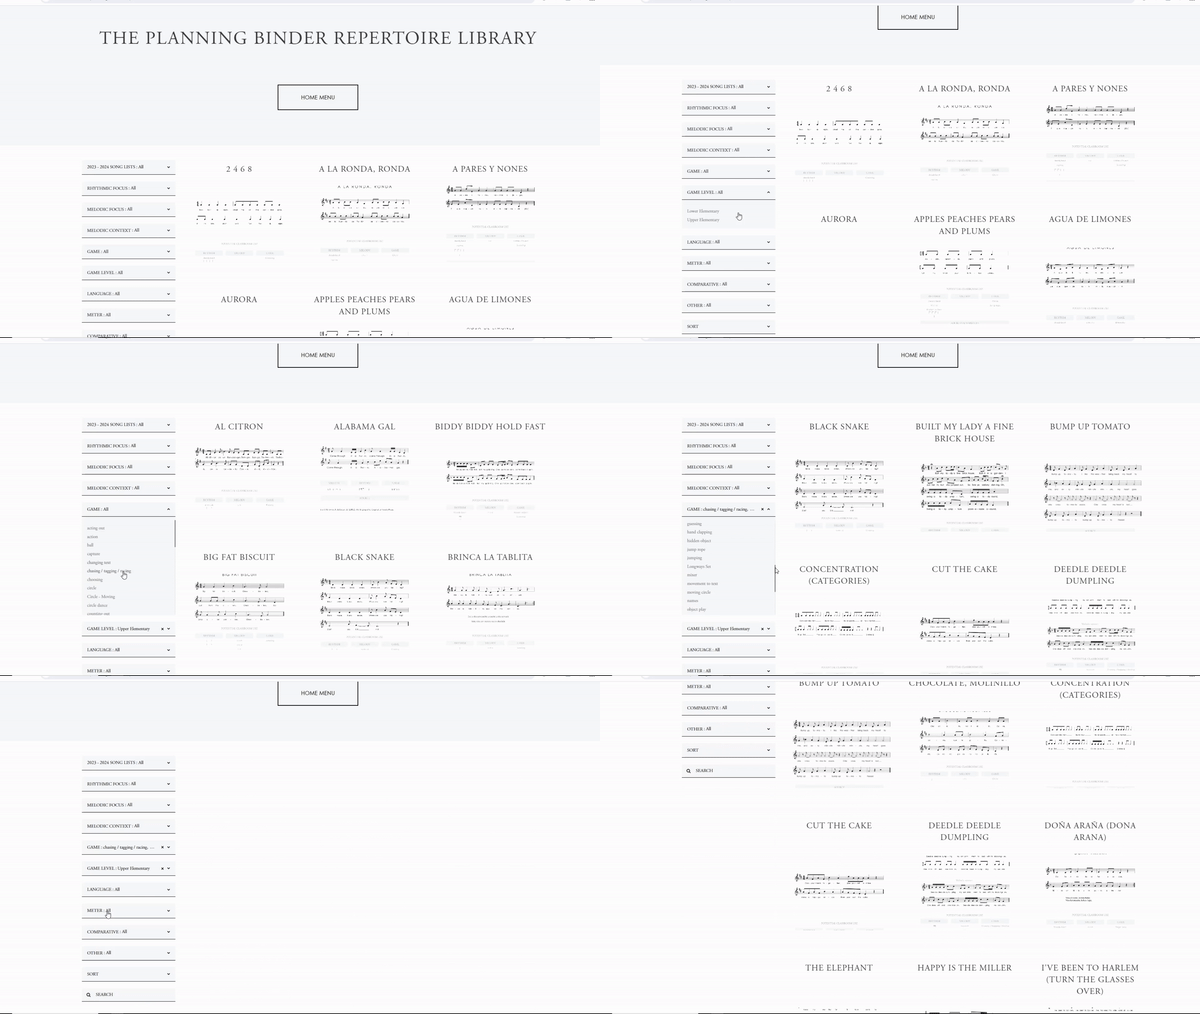
To find these songs, we’ll set our game level to upper elementary and then select the categories:
Chasing / tagging / racing
Elimination
Jumping
Objects
Deedle Deedle Dumpling

This is an old nursery rhyme with two games for chasing, tagging, and racing.
Chasing, Tagging, & Racing Game:
The game is an addition to another song.
Formation: Students take hands to form two concentric circles. A single shoe is on the floor inside the smaller circle, and two students (John 1 and John 2) stand outside the circle.
Directions: Secretly, the teacher chooses two pairs of students to be the doors to the house.
All students sing the song and walk around the circle in opposite directions. At the end, the secret pairs of students raise their hands to create an entry to the middle. Both Johns race to get to the shoe first.
Alternate Game:
Aimee Pfitzner shared a different game in her book, “Sing a Song, Play a Game.”
Formation: Students stand in a circle.
Directions: Students sing as one student walks around the outside. At the end of the song, the person lands behind two people. Those students each take off one shoe and race around the circle in opposite directions. The person who gets back to their place and puts their shoe on first wins.
Listen to Aimee Pfitzner share more about her favorite singing games here
Doña Araña

I love this song for many grade levels, including upper elementary!
You can read about how to use Doña Araña for different grades here.
Chasing, Tagging, & Racing Game:
Formation: Students create a circle (spider web) and connect hands. One student is the fly inside the spider web. One student is the spider outside the spider web.
Directions: Secretly, the teacher chooses a pair of students to create a doorway at the end of the song.
Students sing and walk around the circle with hands connected. At the end of the song, the chosen students raise their hands to create an opening in the circle.
The fly must escape the spider web through the opening and get to the safe zone before being tagged by the spider.

Vamos a Jugar
This clapping elimination game is one of my favorites! It’s so easy to get started, and students love it.
Clapping Elimination Game:
Formation: Students sit in a circle with palms face up. The right hand goes on top of the neighbor’s left hand.
Directions: As the class speaks the rhyme, the steady beat is clapped around the circle. At the end of the rhyme (at the word, “diez”) the person on whom the beat lands is out unless that person pulls their hand away in time.
El Florón

There are several variants of this well-loved song from Puerto Rico and several different versions of the game!
Here’s a version for upper elementary.
Object Passing Game:
Formation: Students stand in a circle.
Directions: Students pass a ball around the circle while singing the song. At the end of the song, the person holding the ball sits down and is out of the game. The rest of the class sings the song again, continuing to pass the ball over the empty spaces left by students who sit down.
To increase the difficulty, students who are seated may reach their hand up to try to swat the ball away from those who are passing (Newlin, 2016).
Big Fat Biscuit
This song from the Sea Islands is a huge hit with upper elementary!
When I introduce the song, I normally begin by having students sing an ostinato as I sing the main song:


Jumping Game:
Formation: Three students line up shoulder-to-shoulder.
Directions: Students sing the song. At each “chew-belew,” students take turns jumping out as far as they can. At the end of the song, the person who has jumped the furthest is the winner.
Why Singing Games?
When we use singing games in upper elementary music, we can increase students’ motivation, engagement, and participation.
More strategies for increasing student engagement
Why is that?
Let’s frame our thinking around two studies that may have some implications for our work in upper elementary music: both in how we approach singing games, and how we approach learning activities for this age group in general.
Competitive vs Non-Competitive Singing Games:

In this 2016 study from Christopher Roberts, the researcher wanted to know if 4th grade and 2nd grade students preferred competitive or noncompetitive singing games.
What do you think he found?
Students in this study preferred competitive singing games over non-competitive singing games.
That finding may feel intuitive to us - we may have expected students to prefer competition based on our own experience teaching this age group. However, what may be more interesting is why students said they enjoyed competitive singing games more. And that reason was a kinesthetic activity - the movement piece was the reason students gave for enjoying these games more.
Even for the students who said they preferred the non-competitive singing game, the reason was the same - they liked the movement.
The Importance of Movement:
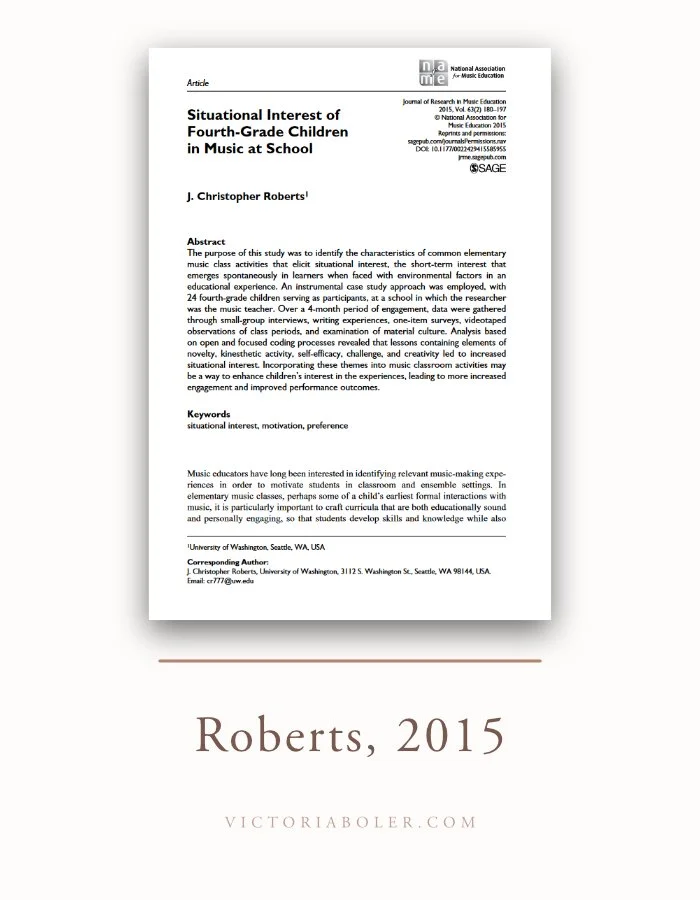
This was what the same researcher found in this earlier study when he wanted to know when 4th grade students were the most interested in music class.
Here’s a quote from one of the 4th grade participants in the earlier study describing their experience with moving in music class:
“You know, because we’re kids, we like to be active, instead of just sitting there, saying sol-la-do. And you notice how all of us, most of the time, are moving around, not sitting still.”
This researcher also used videos of class as part of the dataset.
Reviewing the videos, one of the things the researcher noticed is that when students were preparing for a concert, there was more off-task behavior - staring into space and not singing, playing with shoelaces, etc. Then when the researcher switched to an active singing game, the engagement level went way up. More students were singing, students seemed to be more focused, and more of the class was engaged.
Movement in Music
What might this research suggest to us as upper elementary music teachers?
Movement is really important to this age group!
When we construct learning activities for upper elementary, we can choose to center movement as one of our teaching strategies. These students are not too old to move in music class - in fact, engaging and active singing games are exactly how many students enjoy spending their time with us.
How to Cite this Post:
Boler, V. (2024, May 9). Singing games for upper elementary. https://www.victoriaboler.com/blog/upper-elementary-singing-games
Research Cited:
Roberts, C. (2015). Situational interest of fourth-grade children in music at school. Journal of Research in Music Education. 63(2). https://doi.org/10.1177/0022429415585955
Roberts, C. (2016). ‘Wanna race?’: Primary student preference for competitive or non-competitive singing games. British Journal of Music Education 33(2).https://doi.org/10.1017/S0265051715000236
8 May 2024, 10:59 am - Barred Instrument Exploration Activities
Let’s look at some ways to introduce the instruments through a few different pathways: a fingerplay, a circle dance, and a picture book.
We’ll prioritize using them respectfully and playfully.
We’ll highlight playing technique to students who are new to these instruments, or to students who need a refresher.
Let’s jump in!
-
JUMP TO ACTIVITIES
Barred Instrument Exploration: Setting the Tone
Here is a quick guide to getting started with barred instruments.
Instrument Mechanics
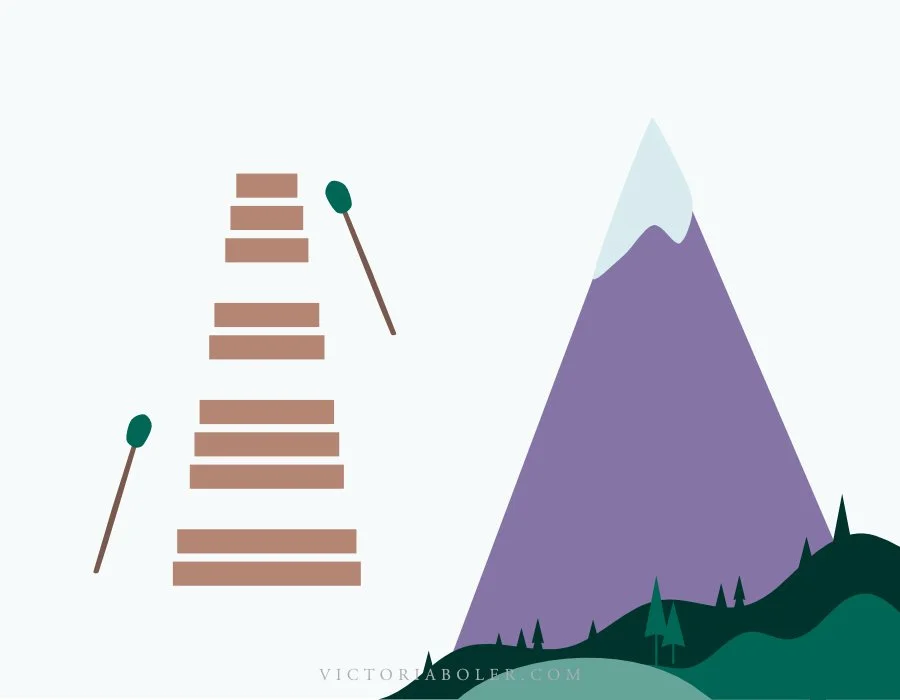
Which is the high side? Which is the low side? Students who are new to the barred instruments can need guidance on how to tell the difference.
Barred instrument exploration allows us time to get acquainted with how the instrument is constructed.
Our instruments are shaped like a mountain. The narrow side is on top, the wide side is on the bottom. Even when we move the instrument around, no matter how we look at it, the high and low sounds of the instrument stay the same.
Holding the Mallets
I ask my students to pinch the mallet with their index finger and thumb, then wrap their other fingers around the mallet, then turn their elbows out slightly like they’re riding a bicycle.
We want to avoid students playing the instrument with their thumbs facing up. Instead, we want the top of their hand to face the ceiling as they play.
Playing Technique
When we give space for barred instrument exploration, students have time to figure out how they need to maneuver their hands to get the best sound.
Students should play with a gentle bounce in the middle of each bar. Periodically dropping in verbal cues with this imagery can be helpful. For example, instead of exclusively saying “Play this rhythm on G,” we can say “gently bounce your mallets to this rhythm on G.”
Getting to the Instruments
Take time to model and practice how to physically get to the instruments.
We always walk around the instruments. We don’t walk over. We don’t walk through.
Care and Respect
These instruments are very special! They may have made a journey to get to the music classroom, and were perhaps helped by grant funding from a particular organization, school funding, community donations, etc. Telling students the story of the instruments - how they got to be here, how valuable they are, etc. sets the one for how we approach them with care.
These instruments are tools we use to express musical ideas. We’re ready to use them when we show that we’re ready to treat them with care.
Culture of Play
In our first invitations at the barred instruments, we can infuse the interactions with a tone of play. Through the activities we’ll talk about today, students have opportunities to “noodle” around, and create their own sounds within our parameters.
Barred Instrument Exploration with Dona Arana
It’s no surprise that I’m excited to use Dona Arana!
In this sequence, after we sing the song with the fingerplay, we’ll use mallet exploration as the first step.
Dona Arana Overview
Mallet exploration
Barred instrument exploration
Barred instrument sound story improvisation
Step 1: Mallet Exploration
Sing the song and act out the story with mallets

The teacher sings and acts out the story with mallets. Students follow along.
A few students at a time use mallets and imitate the teacher. At the end of the song, they pass the mallets off to someone who was following along.
Eventually, every other student has a set of mallets.
Perhaps in another class, the teacher wonders, how could you tell the story of Dona Arana with your mallets, but change how you move your mallets? Still copy me, but find some small changes.
Repeat the activity, students find their own way to gently use the mallets to tell the story in a different way.
Step 2: Barred Instrument Exploration
With a few instruments set up vertically, the teacher models what it sounds like for Dona Arana to walk at the bottom of the instrument, then spin her web up, dance at the top of the instrument, then gently come back down.
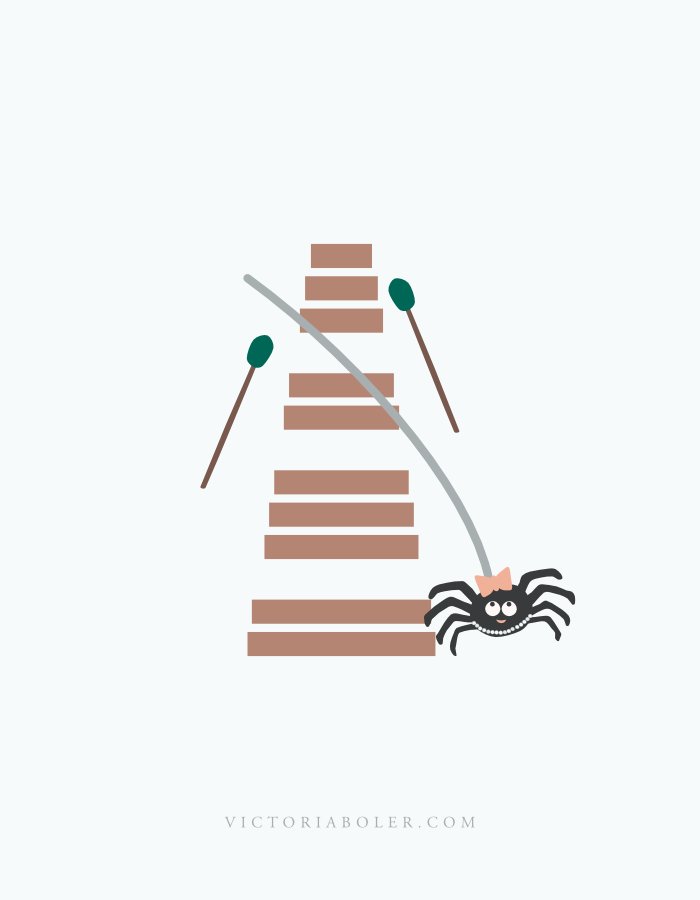
A few students at a time come to an instrument and play the song with the teacher.
Doña araña se fue a pasear.. Let’s go for a walk on our instrument. You can do what I do, or you can walk a different way.
Hizo un hilo y se puso a trepar…. Let’s spin our webs up….. You can spin your web like mine, or do something different.
Students pass off their mallets to another student in the circle
Eventually, set up the instruments vertically so every third student (or so) has an instrument in front of them.
Repeat the activity. Add in playing position and rest position. Students at the instruments play the story while the rest of the class models without mallets.
When they’re done, students put down the mallets and the whole circle moves over one spot.
Step 3: Barred Instrument Improvisation
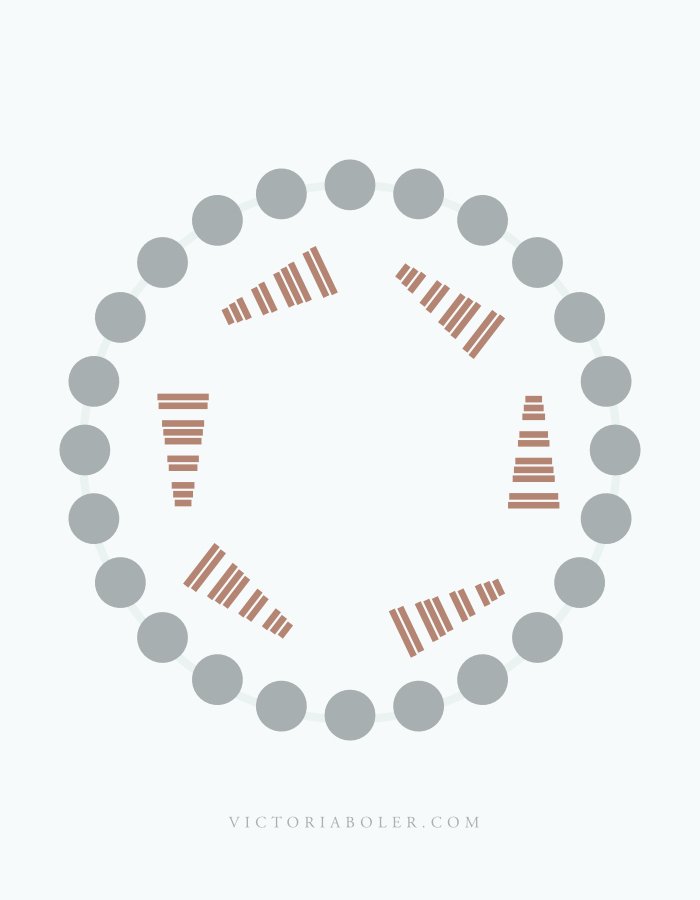
What shape did Dona Arana make as she was spinning her spider web?
The teacher plays a short fragment, then echoes the fragment vocally.
Students take turns playing a short spider web song, then pass the mallets to someone who echoes.
Doña Araña Feedback
Doña Araña: This activity is.... Too advanced for my students Just right! Too simple for my students Comment: Thank you!“Come Back, Ben”
These activities are framed around the book, “Come Back, Ben” by Ann Hassett and John Hassett.
Using a curricular lens, we’ll narrow in our melodic focus to sol mi, and sol mi la patterns.
“Come Back, Ben” Overview
Read the story
Movement and vocal exploration
Mallet exploration
Barred instrument exploration
Sing, move, and play the story
Step One: Read the Story
This is a delightful book about a boy who leaves his house on a balloon. The text is simple, but imaginative and playful.
In this step, we’ll read the story to students.

Step Two: Movement and Vocal Exploration
In the next reading, students find an empty space in the classroom to sit and listen to the story.
We’ll create our own illustrations of the story through movement and vocalization. Students follow the teacher’s cue to show their ideas, while staying in their spots.
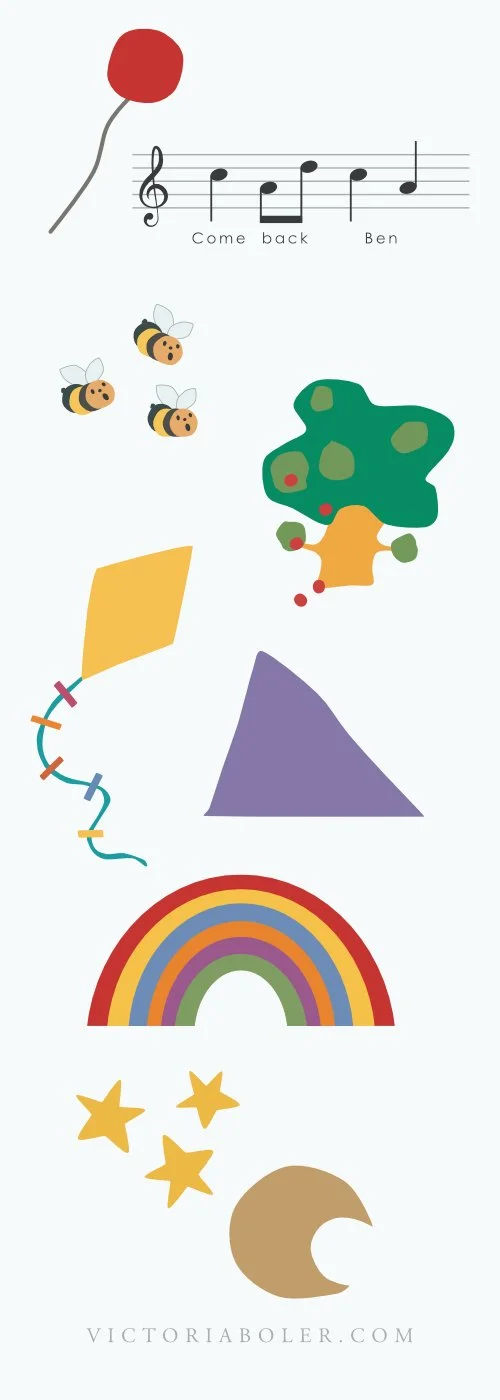
The teacher reads the story again, and prompts students to use vocal and movement exploration throughout the book:
“Ben’s balloon went up” - the teacher makes a vocalization that goes up on a neutral syllable, and motions for students to echo the vocalization. Students move up as they echo
“Come back, Ben” - the teacher sings on a s m l s m pattern, and motions for students to echo
Bees - Choose one bee on the page to illustrate with your voice. Make gentle buzzing bee sounds as you trace the bee’s pathway in the air
Tree - Choose an apple from the tree. With your voice, make the apple gently fall from the tree, then roll down the hill. Staying in your personal space, show what that looks like by moving high to low as you vocalize
Kite - Trace the pathway of the kite’s string. Find a way to show that wiggly shape by lying on the ground in your own personal space.
Hill - Make your voice start at the bottom of the hill and climb up, then start at the top of the hill and climb down
Rainbow - Choose one color of the rainbow to slide down with your voice
Stars - Make twinkling star sounds with your voice while you twinkle your fingers in the air
Moon rocks - Make gentle rock sounds with your voice. Could you make gentle rock sounds by clicking your fingernails together? Tapping the floor? Scraping your shoe?
Step Three: Mallet exploration
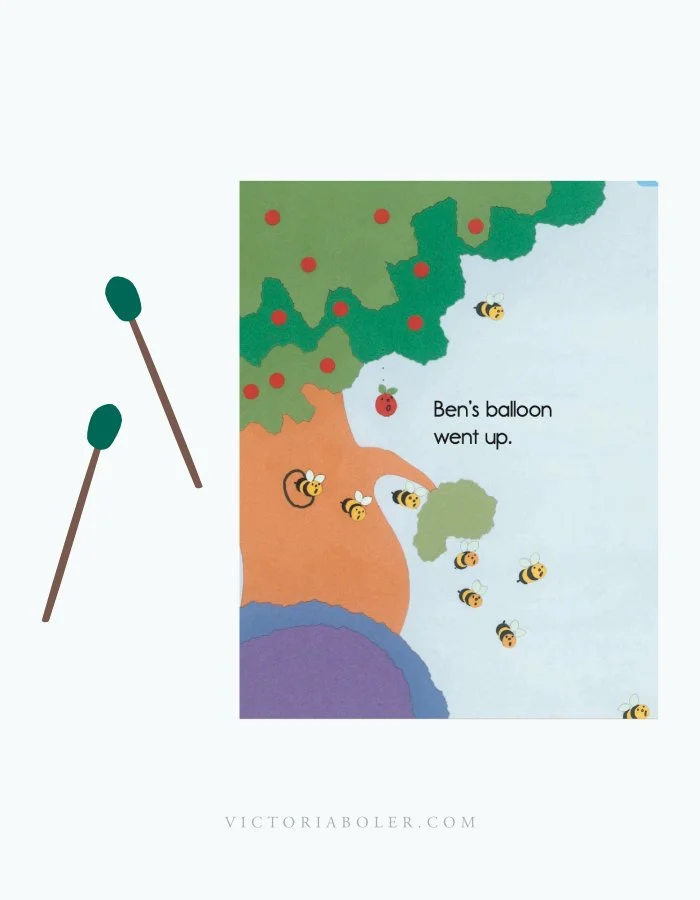
Let’s transfer the vocal and movement exploration to mallets.
As a class, we’ll explore how the mallets can help show the story using a few selected pages from the book.
Demonstrate how to hold the mallets.
Seated in a circle, a few students at a time use their balloons (mallets) to help illustrate the text as the rest of the class continues to vocalize and move.
Students with mallets pass them to the person next to them.
Step Four: Barred Instrument Exploration
Look at the image of the hill. Notice that the high side of the hill is narrow. The low side of the hill is wide. This matches our instrument!
Hold the instrument up and demonstrate the high side and the low side. Notice that whichever way the instrument is placed (horizontally, vertically, upside down, etc.) the high side is always the narrow part of the hill, and the low side is always the wide side of the hill.
Place barred instruments vertically in the middle of the circle. Students sit behind the instrument in a row of three.
Each player in the row takes a turn making their balloon mallets gently move up the instrument, then back down, when the teacher prompts.
“Ben’s balloon went up…” Students play from low to high as the rest of the class vocalizes and moves in place
“Ben’s balloon went down… “ Students at the instrument play from high to low as the rest of the class vocalizes and moves in place
“Ben’s balloon floated right in the middle of the air…” Students play in the middle of the instrument as the rest of the class vocalizes and moves in place.
Students with the mallets pass them to the person behind them, then move to the back of the line.
Repeat until all students have had a chance to play
Step Five: Singing and playing the story
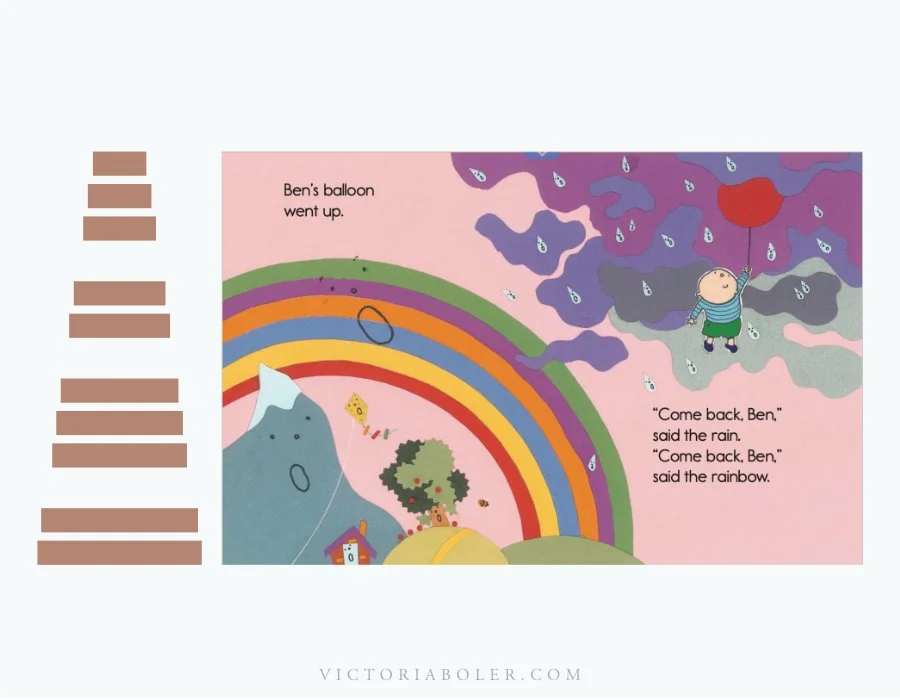
Place instruments horizontally in a circle. Students sit behind the instruments in a group of two or three.
As the teacher reads the story, the students behind the instrument continue to vocalize and move in place.
Students holding the mallets play their vocalization on the barred instrument.
“What would it sound like if you were a tiny bee buzzing gently on your instrument?” “What would you sound like if your mallets were gentle twinkling stars?” “How could you gently slide down the rainbow?”
Periodically, prompt students to hand their mallets to the person behind them and move to the back of the line.
“Come Back, “Ben” Feedback
This activity is... Too advanced for my students Just right! Too simple for my students Comment Thank you!I Don’t Care if the Rain Comes Down
This activity has been adapted from the takadimi concept plan in the 2023 - 2024 Older Beginners Planning Binder.
“I Don’t Care if the Rain Comes Down” Overview
Circle Dance
Body Percussion Improvisation
Barred Instrument Exploration
Barred Instrument Improvisation
Barred Instrument Rondo
Step One: Circle Dance

I developed this circle dance for upper elementary students. With scaffolding, it’s an absolute blast! Especially for students who are new to this type of movement, take the time to work up to the full routine at tempo over several interactions.
Formation: Two concentric circles, students facing a partner
“I don’t care if the rain comes down” - both circles step to the right (face a new partner) the first time. The second time we sing that phrase in the song, step to the left.
“I’m gonna dance all day” - switch places with partner
“Hey hey carry me away” - play the rhythm of the words with snap, clap, pat pat pat pat clap
Introducing the Song:
Seated, the teacher sings and students pat a steady beat. Play body percussion to the rhythm of the words of “hey hey carry me away.”
How many times do we sing and play “hey hey carry me away”? (2)
Students sing and play that section of the song instead of the teacher.
Gradually, release more of the song as students’ responsibility
Scaffolding the dance:
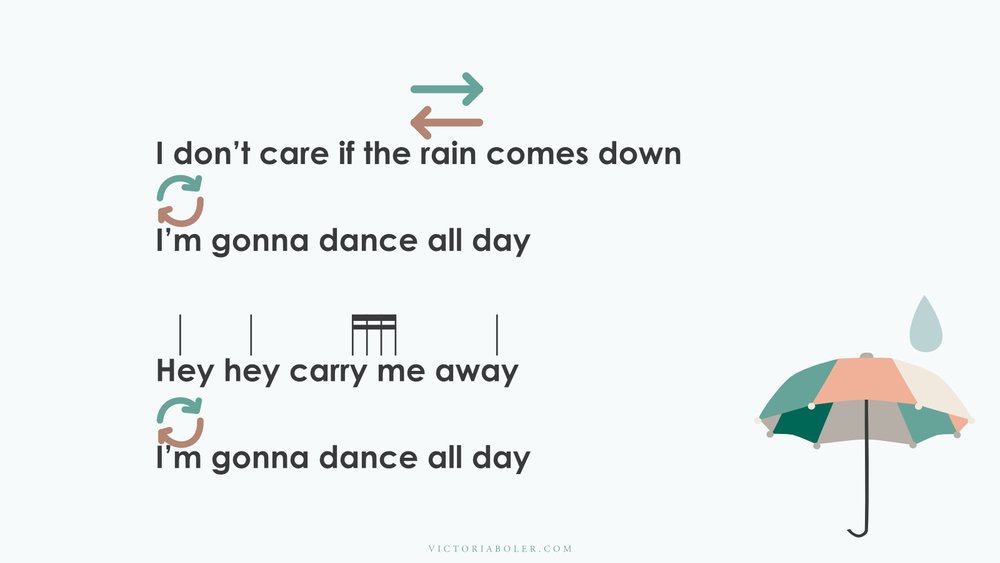
Sing the song standing in a circle. Continue to play the rhythm of the words of “hey hey carry me away.”
Imagine an invisible partner is standing in front of you. The teacher demonstrates switching places with an invisible partner at “I’m gonna dance all day,” then playing the rhythm of “Hey hey carry me away” on body percussion.
All together in a single circle, students practice switching places with an invisible partner, and playing “Hey hey carry me away.” When students switch places with their invisible partner, the whole circle will be back-to-back instead of facing forward.
Students find a partner in a scatter formation and practice on their own
One partner from each group moves to create a single circle. The other partner stands in front of them, creating a double circle.
Add a step to the right and to the left at “I don’t care if the rain comes down”
I find it helpful to change the words of the song “I don’t care if I step to the right” and “I don’t care if I step to the left”
Do a slow walkthrough, then add the song
Step Two: Body percussion improvisation
As a B section, add an improvisation invitation.
Students speak “hey hey carry me away” and the teacher models improvising four beats on body percussion. Repeat three more times.
The teacher speaks “hey hey carry me away” and students improvise four beats of body percussion.

Step Three: Barred Instrument Exploration
Now we move to playing barred instruments!

The teacher shows the high and low side of the instrument, like the instrument is a mountain, with the high narrow side at the top and the low wide side at the bottom. Turn the instrument in several different positions to demonstrate that the sides are always the same.
Seated in pairs at barred instruments set up in C pentatonic, students explore gentle raindrop sounds with their fingertips. As students play, the teacher prompts different images….
What does it sound like for the raindrops to gently fall from high to low? What does it sound like for the raindrops to fall low to high? What if someone splashed in a puddle in the middle of the instrument? What if someone slipped?
Eventually transition to bouncing mallets gently instead of fingertips. As students play, encourage them to verbalize their improvisation choices and explain their thinking to their neighbor.
Step Four: Barred Instrument Improvisation
Next, we’ll ask students to improvise four beats in call-and-response, linking our improvisations back to the body percussion in step two.
Recall the body percussion improvisation from earlier.
Students speak and play body percussion to “Hey hey carry me away,” and the teacher models improvising a four-beat rhythm on one bar of the instrument. Repeat three more times.
Switch jobs. The teacher speaks and plays body percussion to “Hey hey carry me away” and students improvise four beats on a single bar. Repeat three more times.
The teacher models improvising a melody by moving the mallets around the instrument
The teacher speaks “Hey hey carry me away” and students improvise a four-beat melody on their instrument.
At the end of the activity, students turn to their partner and discuss what the activity was like for them - what is it like to make up your own rhythm and your own melody?
Step Five: Barred Instrument Rondo
In this rondo, half the class sings and moves to the circle dance. Half the class sings and plays barred instruments.
A section - All students sing the song. Players at barred instruments play a bordun and sing while players in the circle dance and sing
B, C, D, E sections - Students in the circle speak and play “Hey hey carry me away.” Players at the instruments improvise a four-beat melody while their partner improvises four beats with body percussion.

“I Don’t Care if the Rain Comes Down” Feedback
This activity is... Too advanced for my students Just right! Too simple for my students Comment Thank you!Barred Instrument Exploration in Elementary General Music
Today we’ve looked at several pathways for exploring barred instruments in elementary general music.
In these activities we can prioritize a tone of respect and playfulness. With a fingerplay with lower elementary, a book with middle elementary, and a circle dance with upper elementary, we have examples of the many avenues we can take to creatively explore these instruments.
28 March 2024, 10:26 am -
- Doña Araña: Vocal Exploration, Creative Movement, & a Chasing Game
There are some gems in our repertoire collection we can use over and over, with several grades to highlight different musical concepts. Dona Arana is one of those for me.
Today we’ll look at Dona Arana in three different contexts: Kinder and 1st, 2nd and 3rd, and older beginners.

-
JUMP TO ACTIVITIES
Dona Arana: THe Song

This is a delightful Hispanic fingerplay!
Because of the nature of how folk music spreads, and because of the prominence of the Spanish language and culture around the globe, it can sometimes be difficult to trace the exact people from whom a song originates. For that reason, the source notes this song as “traditional.”
Translation:
Dona Arana went for a walk
She spun her web and began to climb up
Along came a wind storm that caused her to dance
Along came the rain that made her come down
Concept-Based Lesson Planning
When we lesson plan from a concept-based lens, each activity is threaded together over a series of lessons.
When the activity is over, there is a logical and artistic next step. The next lesson plan is a continuation - at a deeper level - of the same concept.
A concept-based approach is a central part of the process inside The Planning Binder.
Learn more in these podcast episodes…
>>> Organizing the Music Lesson Plan: Concepts vs Activities
>>> Nesting Concepts for Active Music-Making and Active Meaning-Making
Vocal Exploration: Kindergarten & 1st grade
This activity is so simple, and so fun!
I shared a variation of the activity on this episode of Teaching Music Tomorrow.
These activities would take place over several lessons, and each interaction would be somewhere between 3 and 5 minutes long.
VOCAL EXPLORATION Overview
Introduce the song with the fingerplay
Echo vocal improvisations at the end of the song
Tell the story with vocal improvisation
Vocal Exploration Process
1) Introducing the Song
To introduce the song, we’ll sit on the floor in a circle with students, and mime out the actions of the song.
Dona Arana se fue a pasear - Our hands walk out in front of us, like a spider going for a walk
Hizo un hilo y se puso a trepar - Our hands spin up in front of us, like a spider climbing up a thread
Vino el viento la hizo bailar - Our hands dance around at the top of the thread
Vino la tormenta la hizo bajar - Our hands come back down
That’s it!
Students don’t sing at this point, they only copy our motions with simultaneous imitation.
2) Vocal Exploration
At the end of the song, the teacher sings a vocalization of Dona Arana’s thread, and students echo.
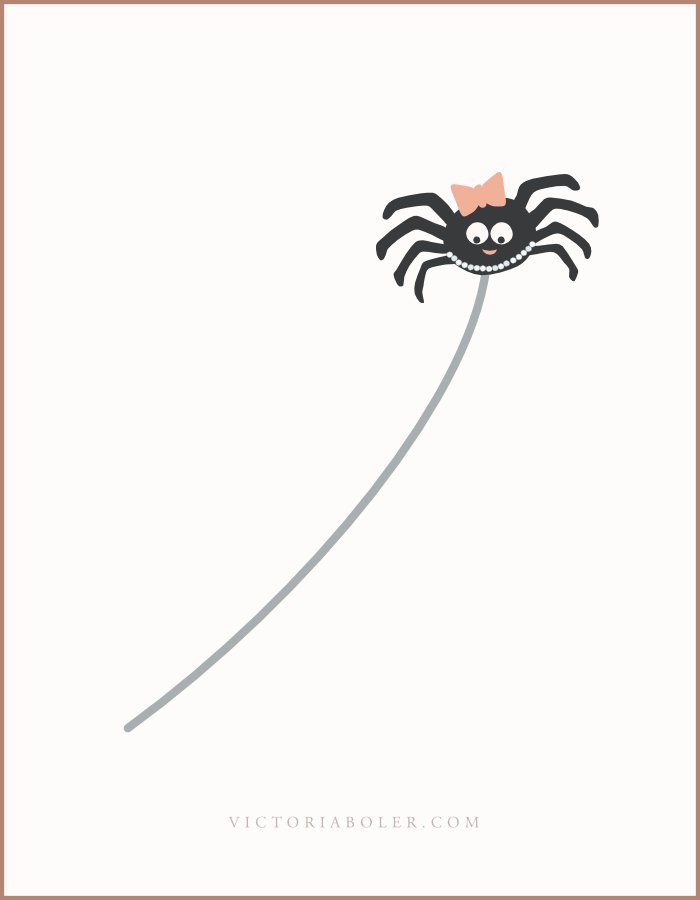
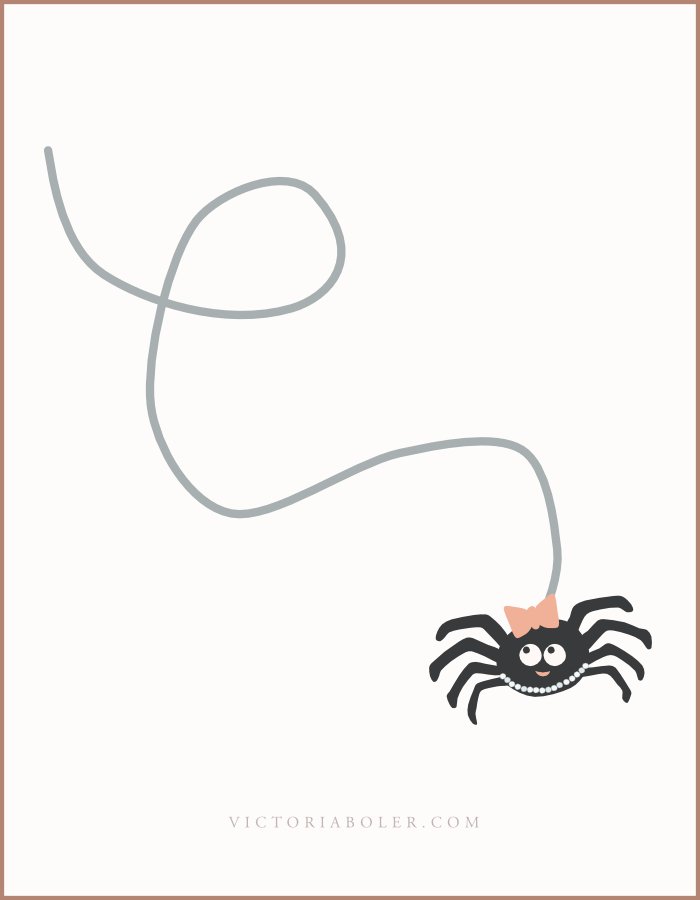
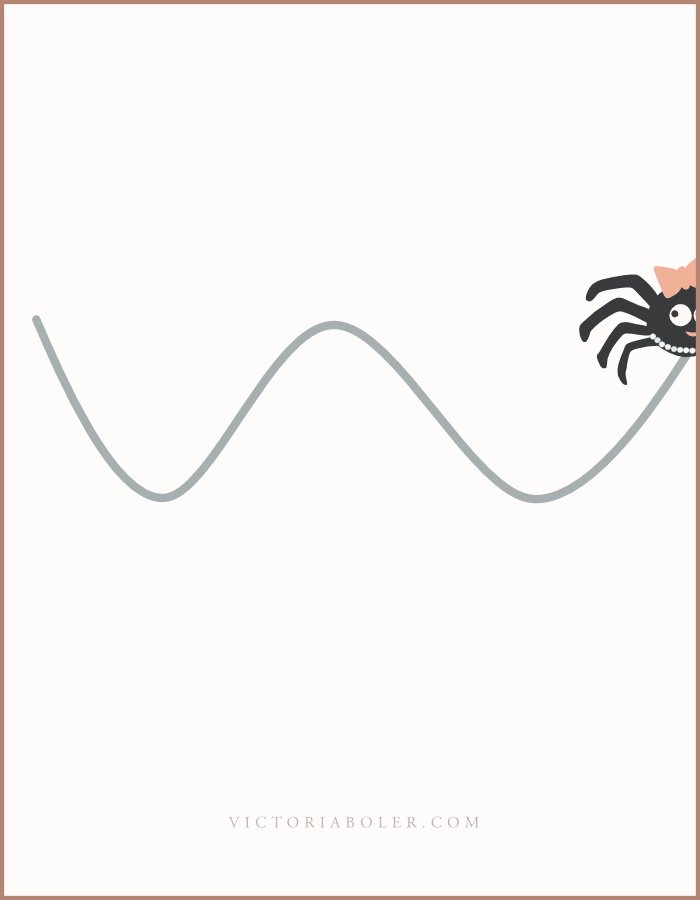
There are so many vocal shapes we could make! Did Dona Arana move from high to low?
What about low to high?
What if she made her thread loop around and around?
What if she was jumping on the thread?
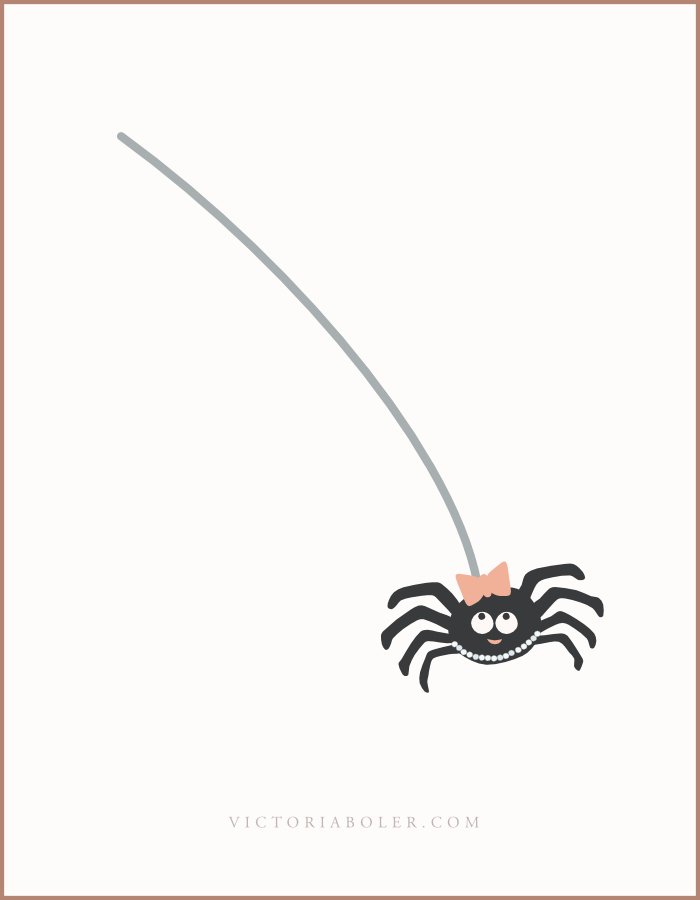
3) Singing the Story
After a while, we might refine our vocal explorations to create an illustration of the story.
Could we paint the story with our voices by moving them high and low, and using different combinations of long and short?
At the beginning of the song, Dona Arana goes for a walk. What could that sound like?
What could it sound like for her to spin her web and climb up?
There was a part of the song where she was dancing at the top. What could that sound like?
What could it sound like for her to go back down the thread?
In this activity, we might choose that we want students to create their vocalizations of the whole story.
Alternatively, if we want to give a few more parameters, we can have students echo our vocalizations for the walking, climbing up, and coming down parts of the story (lines 1, 2, and 4). When Dona Arana dances at the top of the thread in the third subphrase, students can create their own dancing vocalizations.
We Sang the song. Now What?
After we sing the song and tell the story with our voices, what variations could we do? How could we extend this activity?
With a specific focus on high and low, and vocal improvisation, there are many possibilities for extensions!
At the end of the song, the teacher does a vocal improvisation and students choose if they’ll echo the teacher or do something different.
The teacher shares a vocal improvisation, and one student responds with an echo or improvisation
One student does their own vocal exploration idea, and the teacher improvises something different
One student does their own vocal exploration idea, and the whole class responds with an improvisation
One student does their own vocal exploration idea, and one other student answers with an improvisation.
Transfer vocal improvisations to barred instruments.
Creative Movement:
2nd & 3rd GradesI spoke about this song in this podcast episode about planning 2nd and 3rd Grade music, and again in this episode about what we can do when students sing a song inaccurately.
From a musical concept lens, our melodic concept is mi re do.
Even though we’re doing a creative movement activity, we’ll keep the focus on the pitch relationships of high, middle, and low.
CREATIVE MOVeMENT OVERVIEW
Trace melodic contour
Students create spider webs in self-space
Students create spider webs by connecting with a partner
Creative Movement Process
1) Introducing the song
We’ll introduce the song by asking students to listen to it several times, both as they’re stationary and as they move in open space. If you’re interested, you can listen to a podcast episode about open space here.
The teacher sings and uses spider fingers to trace the melodic contour. Students copy the motions
Students make a spider web as they move around in open space
2) Creative Movement: Connections
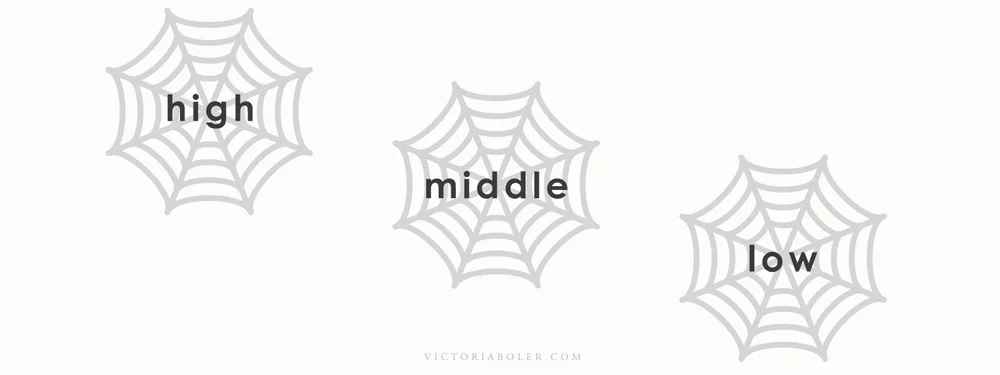
As a B section, let’s create some spider webs with our bodies. We’ll start the process with some open-ended creative movements. Then eventually we’ll ask students to think about a high, middle, and low spider web they can create.
Creating high, middle, and low spider webs to connect to mi re do patterns later is a nice example of physical preparation, which you can read about here.
How could you make a spider web with your body? Think about all the different connection points a spider web has. Think about how interwoven and interconnected it is.
Could you stick your arms out in front of you and connect your fingers together? …. Could you curl over to the side so your hand is touching your shoe while your other hand goes through the circle you just made with your arm? ….. Could you sit down and put your feet together and fold over your legs?
With a set of finger cymbals, or another bright instrument, the teacher signals for students to change to three different spider webs as a B section.
During the A section, students continue to move in open space with their spider web melodic contour.
When students are ready, we can refine their B section movements by asking them to choose a high spider web shape, a middle spider web shape, and a low spider web shape.
3) Creative movement with a partner
When they’re ready for the next step, ask students to find a way to connect with a partner, and create new versions of their spider web shapes.
How could you find a safe way to connect your spiderweb shape with someone else’s? Could you create a connected shape on a high level? On a low level? On a middle level?
Students have a few moments to collaborate, then we put it with the song.
During the A section, students walk around in open space spinning their spider webs to the melodic contour. By the end of the song, they should be with their partner.
As the B section, students show their high, middle, and low spider web shapes with their partner, following the teacher’s finger cymbal signals and vocal cues.
We did the activity. Now what?
What happens after we sing the song and do the movement activity? How does this creative movement prompt move us to other musical and educational experiences?
This is the beauty of planning from a concept-focus lens. Every activity we do builds, grows, and connects to another experience!
There are many extensions from here when we look at this activity as a starting place for mi re do in 2nd and 3rd grade.
Inner Hearing: Students can inner hear the melody as they move around the room in open space
Matching the Melody: The teacher draws two spider web melodic contour shapes. One matches the melody of the song, the other doesn’t. Students figure out which one is the visual representation.
Singing on Solfege: Students can sing the melody on solfege with hand signs
Barred Instrument Exploration: For students new to the barred instruments (or as review), they can explore how to play Dona Arana’s story on the bars
Playing by Ear: When students have analyzed mi re do in this melody, they can figure out how to play the melody by ear with a partner
CHASING GAME:
OLDER BEGINNERSEverything here is from the 2023 - 2024 Planning Binder.
Like the 2nd and 3rd grade activities, this focus is still on mi re do. You’ll see that in the introduction of the song, and then again in the extensions we use later.
With older beginners especially, we have an opportunity to pair competitive play with musical skill-development. Traditionally in children’s musical culture, singing facilitates cooperative and competitive games, and is an important part of learning social interaction. This is one of the ways we can increase overall musical participation, and develop “analog” social skills in the parameters of the music room. Even though this game is an addition, it is in the spirit of play-based interactions that are consistent with children’s singing culture across many musical traditions.
CHASING GAME OVERVIEW
Introduce the song with body percussion
Scaffold game with a single circle
Play game with a double circle
Chasing Game Process
1) INTRODUCING THE SONG with Body pErcussion
Our song introduction highlights mi re do through body percussion. We’re also including some opportunities for student choice as students learn the song.
The main thing to emphasize is that the body percussion pattern students have been playing matches the melodic contour of the song - when our melody goes up, our body percussion goes up. When our melody goes down, our body percussion goes down.

The teacher demonstrates a body percussion pattern, and all students join in when they can.
When students have the body percussion pattern down (or mostly down), the teacher adds the song. Students continue following the pattern as they listen.
The teacher displays questions on the board and students choose a question to answer in their heads. Repeat the activity, with students playing body percussion and the teacher singing the song.
After a few more rounds, students share what they noticed.
Eventually students have heard the song multiple times, and we can teach it by rote. Students sing the first prase, the teacher sings the rest. Gradually over time, we’ll release more phrases to students for them to sing instead of us.
2) Scaffold the Game
Eventually this game is a double-circle chasing game, which I pulled from another folk song. This game is not in the original source.
Students sing the song and walk in a circle (spider web). Switch directions at each 8-beat phrase.
Students create a double spiderweb by facing a partner, so there is an inside circle and an outside circle.
Repeat the activity, with the inside circle and the outside circle moving in opposite directions. Continue to change directions at each phrase.
Add chasing game: One student is the spider. The spider stands outside the circles. One student is the fly. The fly stands in the middle of the circles.
At the end of the song, the fly tries to get out of the circles, and away from the spider. The spider tries to tag the fly on the shoulder. The whole class counts to ten as the spider chases the fly.
3) CHASING GAME
After students have played the game and they’re ready to move on, we can point out that the game isn’t quite tricky enough. The spider can get out anywhere! What could we do to make this game even more challenging?
All students in find a way to connect (take hands, link elbows, link pinkies, etc.).
The teacher chooses a pair of students in each circle to raise their hands at the end of the song, creating an opening through which the spider and fly can move. The spider and fly can only enter and exit the circle through those openings.
But wait I just thought of an idea……
From the single circle, students move to stand in front of a partner. This creates an inside circle and an outside circle.
The inside circle connects with each other and the outside circle connects with each other. The teacher chooses a pair of students from each circle to raise their hands at the end of the song. Now, the spider and fly can only move in and out of the web through the raised hands.
We Played the Game. Now What?
What’s next?
Because we’re using this with the lens of a musical concept, and not just a fun activity (even though the activity is fun!) we can do a lot of extensions with this song.
Inside The Planning Binder we extended this song to work on do re mi and mi re do patterns.
Physical Prep: Students play the body percussion pattern with a partner
Visual Prep: Students help the teacher drag icons to show the melodic contour of the song
Present: Students establish a classroom vocabulary for the high, middle, and low sounds.
Read: Students read the melody on the board with solfege hand signs
Play: Students figure out where mi re do would live on the barred instruments
Arrange: Students use rhythmic building blocks to arrange a rhythm, then add a mi re do melody to it
Finding New Activities or Threading Musical Concepts?
When we lesson plan, it can be so helpful to look at activities through a concept lens!
What is the purpose of the activity? Where does it lead? How does this activity help us build skills and understandings over time?
Thinking about a conceptual focus can help us extend the fun of songs like Dona Arana across many different lessons, throughout many different grades.
17 February 2024, 8:03 pm -
- Kindergarten Music songs, games, & activities
Our repertoire in Kindergarten serves multiple purposes at the same time.
From a musical standpoint, these songs and rhymes form the basis for all the other musical work we’ll do in later years. Musical expectations about things like phrasing, tonality, meter, and form are constructed through active musical experiences in Kindergarten.
But perhaps more importantly, this is also where we learn crucial skills about how to interact with each other in a group setting. What is it like to make music in a collaborative, collective ensemble? What will the overall tone of music class be?
Ideally, in addition to building music foundations, we’re also building a love for music class, a joy from being together, and the capacity to engage with many different types of musics on many different levels.

Teaching Music Tomorrow: Kindergarten Music Series
In the new Kindergarten Music series on Teaching Music Tomorrow, Anne Mileski and I are talking about active Kindergarten experiences for developing musicianship skills in a play-based way.
Click here to listen and learn more.
Action Song: All Around the Brickyard

What a great action song for entering the classroom, or any time throughout the lesson!
This song has been well-loved across many places in America, but was collected in Illinois as a circle dance (McIntosh, 1957).
Song Activity:
In the classroom today, it’s more commonly sung as a follow-the-leader, action game in which students suggest movements to replace the text.
For example, “I’m gonna jump it and a jump it,” “I’m gonna wiggle it and a wiggle it,” etc.
Consider starting with the teacher as the line leader, leading the class around the room, and calling out different movements with each iteration. After a few rounds students can suggest their own motions, and eventually be the line leader instead of the teacher.
Ball-Bouncing Game: Bounce High Bounce Low

This is a Kindergarten classic!
It’s a great game to use at the beginning of the year, or after a break, especially when learning names.
Singing Game Directions:
To play the game, students stand in a circle with one student in the middle. That student in the middle bounces a ball on the strong beats of the song as the whole class sings. Instead of “Shilo,” the class sings the name of another student in the circle. The person in the middle bounces the ball to the chosen student and the two switch places. Repeat the activity with different student names each time.
To save time with choosing which student’s name the class will sing in the next iteration of the song, I have also modified this game to have a solo singing component. The whole class sings the first four beats (“bounce high bounce low”) and the student in the middle sings “bounce the ball to __(student name)___.”
Circle Game: Old Bald Eagle

A classic play party, this singing game has been re-imagined for young music students in a classroom setting.
In an interview, Jean Ritchie (1957) commented that Old Bald Eagle was often the last song they would sing at their “singing plays” before it was time to go home. This can make it another great song to use at the end of class, like “Caballito Blanco.”
Singing Game Directions:
Students create a circle with one student on the inside. That student walks around the inside of the circle as the class sings the song. At the end, the student in the middle chooses the student they are standing next to, and both students walk around the middle of the circle as the class sings “two bald eagles sail around.”
Cumulative Song: Juanito Quando Baila

How does young Juan like to dance? He dances with his feet, his hands, his fingers, his elbow…. Just like this!
This Spanish song has been loved by many children across many Spanish-speaking countries, making it difficult to pinpoint an exact location for its origin. Kindergartners can add themselves to the collection of children across the world who love singing and moving to this Spanish song!
additional Verses
(2) Con el pie pie pie (foot)
(3) Con la rodilla dilla dilla (knee)
(4) Con la cadera dera dera (hip)
(5) Con la mano mano mano (hand)
(6) Con el codo codo codo (elbow)
(7) Con el hombro hombro hombro (shoulder)
(8) Con la cabeza eza eza (head)
Song Activity:
Sing the song and dance with each new addition to the text.
This is a cumulative song. Each time through, add on one more body part to dance with!
Echo Singing GAME: Charlie Over the Ocean

By the time this singing game was recorded in its current version, it was no longer associated with its original social and political connotations. Like other mentions of Charles Edward Stewart in Scottish songs like “Over the River to Charlie,” Scottish songs with Jacobite references eventually became encompassed into play parties, then in children’s singing games, and transitioned into the singing games we love today.
Singing Game Directions:
Students create a circle with a leader on the outside. The leader sings the song while moving around the outside of the circle, and the rest of the class echoes. In the last line (“can’t catch me”), the leader taps the student closest to them on the shoulder. Both students run around the circle, with the student who was just tagged trying to catch the leader.
If the leader makes it back to the tagged student’s spot, the student who was tagged becomes the new leader and the game begins again. If the leader is caught, they lead the game in the next round.
You can also have students walk, or jump, or hop on one foot around the circle if running doesn’t work for your situation.
Greeting Song: Bonjour, Mes Amis

This activity is a hit at the beginning of my Kindergarten lessons! I’ve used it in other grades as well, and it’s just as delightful.
Translation
Hello, my friends, hello!
Song Activity
There isn’t a game or activity that accompanies this song, so this is one I have added.
In this activity, I ask students to imagine how they would greet a friend if they couldn’t use any words. We explore all sorts of non-verbal waves: waving two hands enthusiastically, wiggling fingers, Barbie wave, etc.
With a few student ideas at a time, the teacher signs and shows different ways to wave for each phrase. Students copy the teacher’s movements.
Another day, students choose their favorite three silent ways to wave. Practice switching between the three waves, following the teacher as they hold up 1, 2, or 3 fingers. Students sing the song and wave with their first, second, and third movement choices as the teacher directs.
Imaginative Play Song: Con Mi Martillo

What could we build with our hammer?
Translation
With my hammer, hammer, hammer,
with my hammer I hammer
Song Activity
In this activity I‘ve added to the song, my Kindergarteners love suggesting things we could make.
Students imagine what we could build, the class sings the song as we pat imaginary hammers, and then we inspect our work. Each iteration of the song, the teacher discovers we have made a mistake following the directions, and have almost finished building something else entirely. Students suggest what we built by accident, and we sing the song again.
LOCOMOTOR Pathway Song: Caballio Blanco

This is another hit in my Kindergarten lessons, and another song that doesn’t come with a standardized activity. Instead, I’ve added a movement activity to help us line up at the end of class.
Translation:
Little white pony, take me from here
Take me to my home where I was born
Song Activity
Students sing the song and walk in a circle. (My students sit in a circle, so it’s easy to stand and point our “noses and our toeses” in one direction.)
At some point, the teacher breaks away from the circle and the class continues to follow. Explore different movement pathways around the room such as zig-zag, straight, curvy, etc.) With each iteration of the song, ask students to suggest how much further the little white pony has to travel until we’re back home.
Eventually the teacher leads the line of students to the door.
Lullaby: Sulla Rulla

Sulla Rulla is one of my favorite lullabies for Kindergarten, or any age!
It’s associated with Østerdalen, a valley in southeastern Norway. The phases, “sulla rulla,” or “sulla lulla,” are calming sounds used in many Nordic lullabies. Traditional performance practice would include an elongation of consonants rather than vowels, specifically with the “ll” sound.
This song is sourced from the collection at Nordic Sounds.
Song Activity
Sing this song as you rock side to side. If you have stuffed animals in your class, have students take turns rocking them as they sing.
Move & Freeze dance: Las Estatuas de Marfil

This singing game from Mexico is such a great way to practice movement and stillness! Montoya-Stier (2008) suggested that teachers might give categories of statues for students to explore (animals, etc.).
Translation
Like the ivory statues,
one, two, three, like this
Singing Game Directions
There are several ways to play this game about ivory statues, all of which involve freezing in place at the end of the song.
For Kindergarten, a fun way to play is to move around a circle, or around the room in open space, while singing the song. One student stands at the front of the room, facing the other students. At the end, all students freeze in their favorite statue shape. If anyone moves the person at the front of the room calls their name and they are out in the next round of the game.
Movement Song: Just From the Kitchen
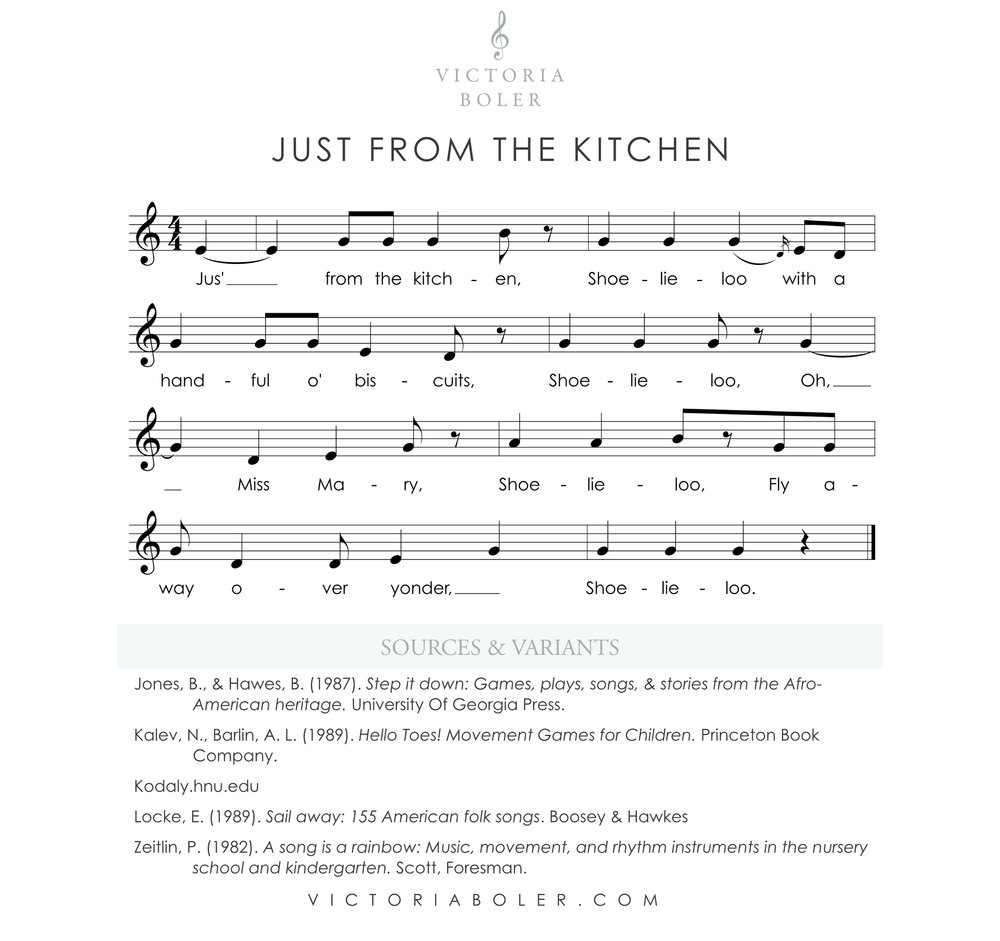
This children’s ring game was shared by the beloved singer, Bessie Jones. Bessie Jones is one of the most well-known singers from the Georgia Sea Islands, and has contributed tremendously to the field of children’s music education through her preservation and dissemination of Georgia Sea Islands culture.
The phrase, “shoo lie loo” was believed by Jones to be a joyful expression of gratitude. The song references children playing in the yard who periodically go into the kitchen and come back out with a handful of biscuits.
Singing Game Directions:
Students stand in a circle and sing the response. In the place of "Miss Mary", the lead singer sings the name of another student in the circle. That student improvises a movement as he or she travels to the opposite side of the circle.
Singing Story: Aiken Drum

The history of Aiken Drum is fascinating!
The melody I notated here is from The melody I have notated here is from Crane (1878) and Forrai (1990), but there are many more tunes associated with the name, “Aiken Drum,” and even more stories about its origin. You can find more in the “sources and variants” section of the repertoire page.
From my reading of the sources, this is a very old Scottish children’s song that was recycled into a Jacobite ballad, and like “Charlie Over the Ocean,” this song isn’t currently associated with the Jacobite cause or Charles Edward Stuart. Some other early versions include another character, Willie Wood, before Aiken Drum is introduced.
Song Activity:
In the classroom, students love changing the foods Aiken Drum was made of.
For example:
His head was made of a tomato, a tomato, a tomato...
His hair was made of spaghetti, of spaghetti, of spaghetti...
His nose was made of a strawberry, of a strawberry, of a strawberry…
Winding Game: Caracol Col Col

Winding games are delightful additions to Kindergarten music, provided every member of the group shows the self-control to keep everyone safe!
The text of this song is conducive to encouraging self-control, as students pretend to be very slow snails.
Translation
Little snail snail snail,
Take out your horns and stand in the sun
Singing Game Directions:
Students hold hands in a line, with a leader at the front. The leader moves the line in an inward circle, creating a spiral like a snail. Eventually the leader turns around and unwinds the group.
Fun & Games - where to find more

I don’t think I’ve met a person who loves Kindergarten music as much as my friend, Anne Mileski.
Anne and I collaborate on the podcast, “Teaching Music Tomorrow.” If you’re interested in more songs, games, and activities for Kindergarten music, I cannot recommend enough that you jump over to teachingmusictomorrow.com to listen to our latest podcast season about Kindergarten music!
15 January 2024, 5:51 pm - Curriculum Maps for Elementary General Music
“What will I teach this year?”
“What grade does this song work for?”
“What do I do after this unit?”
These are questions we all ask in our teaching, and we can start to explore their answers with a curriculum outline, or curriculum map.
A curriculum outline is one document that can make our planning time both manageable and meaningful.
Today we’ll:
Look at a curriculum outline example
Talk about how it’s constructed
Look at other possible sequences
Think about what’s missing in the document
Let’s jump in!
Curriculum Outline
Here is an example of the curriculum outline from The Planning Binder 2023 - 2024 school year.

This is a broad look at an entire elementary music program, at each grade level.
This document is organized by musical concepts. The emphasis is on foundational musical elements that can be transferred to many different musical skills and many different areas of musical understanding.
Learn moreTwo important items to consider in the interpretation of this document have to do with the role of discipline concepts and the distinction between experiences and conscious learning.
Organized By Discipline-Specific Concepts
As we organize our curricula by concepts, we help students build understanding and transfer it to new musical situations, both inside and outside the classroom.
For example, if we teach students to understand pitch - melodic contour, intervallic relationships, etc. - and we give students tools to listen critically, analyze what they hear, and articulate their thinking, they have what they need to transfer their understanding to many different musical scenarios.
They are equipped to play a melody by ear on guitar or harmonica or metallophone. They might choose to compose their own melody and teach it to a friend or arrange it for an ensemble.
In the construction of this curriculum outline, there is a choice to lean toward transferrable musical patterns and ideas and lean away from siloed musical units.
Experiences and Conscious Vocabulary
Another thing I think is important to note about this document is that these are times when the musical ideas are highlighted and students are aligned on musical vocabulary.
These are not the only times the musical events are experienced.
For example, we can sing songs in many different modes (like these entrance songs) even if students do not consciously know the mode’s label and how to aurally identify it or write it on the five-line staff.


Read More: 3 Curriculum Outlines: Kodaly-Inspired, Orff-Inspired, and Beginning Student
Read More: Planning Ahead: Creating Your Ideal Music Curriculum
Listen: Long-Range Planning for Elementary General Music
Teaching Sequences for Elementary Music
In our conversations about what we’re going to teach in the next lesson, the “why” behind a musical sequence can sometimes be overlooked.
Even though it’s easy for all of us to get caught up in our efforts to make music with students as quickly and efficiently as possible, thinking through the purpose of a teaching sequence can be helpful as we make decisions about our own situations.
Known to the Unknown
One of the core principles we use in a spiraled curriculum is the idea of moving from the known to the unknown.

This came out of the work and followers of Pestalozzi. Educators who use this principle believe that learning does not take place in a vacuum. When students learn something new, it is because they have connected it to previously known material.
Musical knowledge and understanding are predicated on older information and experiences.
As we move from what Pestalozzi described as “from the simple to the complex,” we can help students process through and link old (known) musical patterns and vocabulary to new (unknown) musical experiences. Students can consider the aural qualities of new musical material (tonality, duration, intervals, patterns, etc.) by comparing it to the musical qualities they already know.
Sequence Options
As we put together a sequence of musical patterns, we want the information to be in a logical and artistic flow of musical ideas.
The way we get there is by choosing a sequence that has patterns organically represented in the repertoire. The role of the teacher is not to manufacture a curricular experience. Instead, it is to help students guide their ears and pull out extractable patterns.
With the criteria of a logical and artistic flow of patterns represented organically in the repertoire, there are many possible options for musical sequences! And music teachers certainly use a variety of well-thought out progressions of musical ideas in our teaching. Teachers naturally use different sequences, and even within classrooms following the same sequence, no two teachers give instruction or direct learning in exactly the same way.
Each situation is unique.
Example Sequences
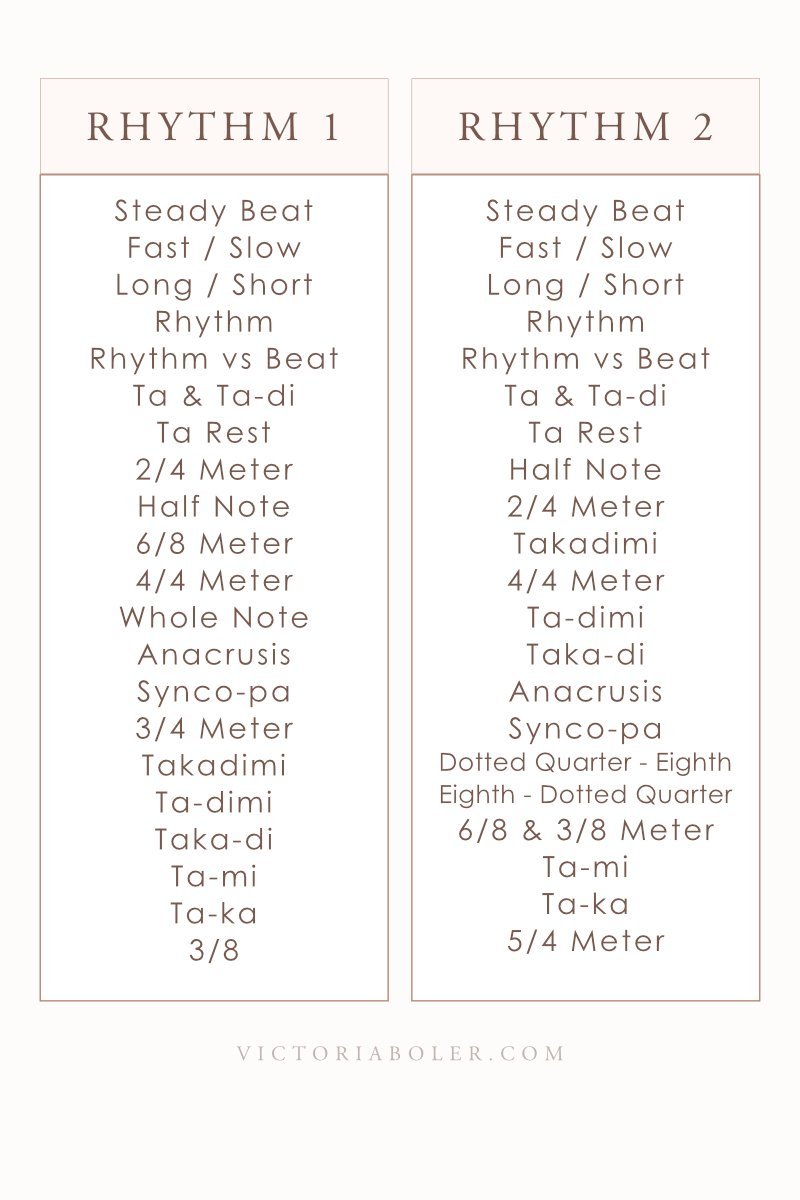
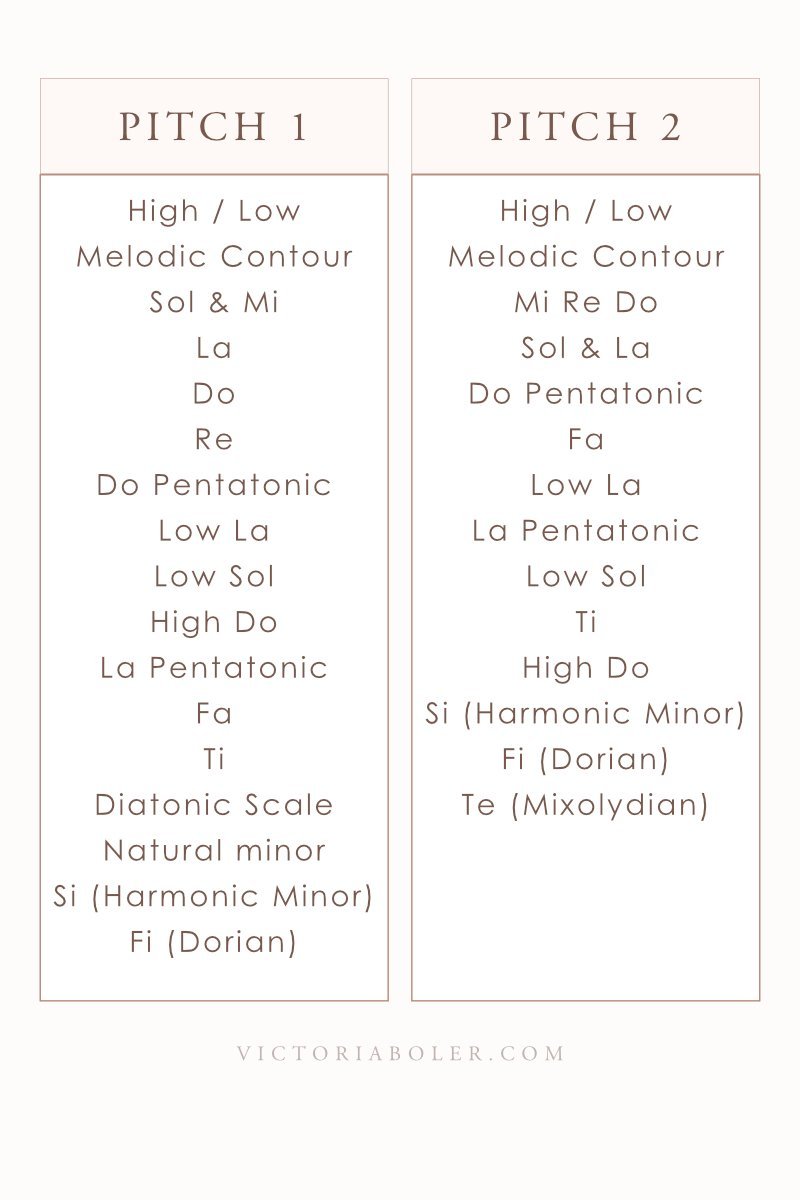
Here are a few example sequences for elementary general music. Certainly, more exist in our classrooms, and even more exist in musical repertoire.
The reason to consider these examples is to illustrate that each of us can make informed decisions about our progressions based on many different factors.
A list of sources is included at the bottom of this post.
Rhythm and Pitch Sequences
Many educators choose to structure their curricula largely around rhythm and pitch.
In my opinion, this is because having aural training and common vocabulary around rhythm and pitch allows us to communicate more clearly about other musical elements.
So for example, we can describe the form of a song easier if we can describe the rhythm changes in the different sections. It’s easier for us to describe the harmonic outline of a piece if we have training and a common vocabulary to describe the contour of the bass line.
In this decision of a curriculum outline, rhythm and pitch function as pillar progressions, and do a lot of heavy lifting in the framing of other elements.
Here are a few examples - to reiterate, there are more options available than what is represented here!
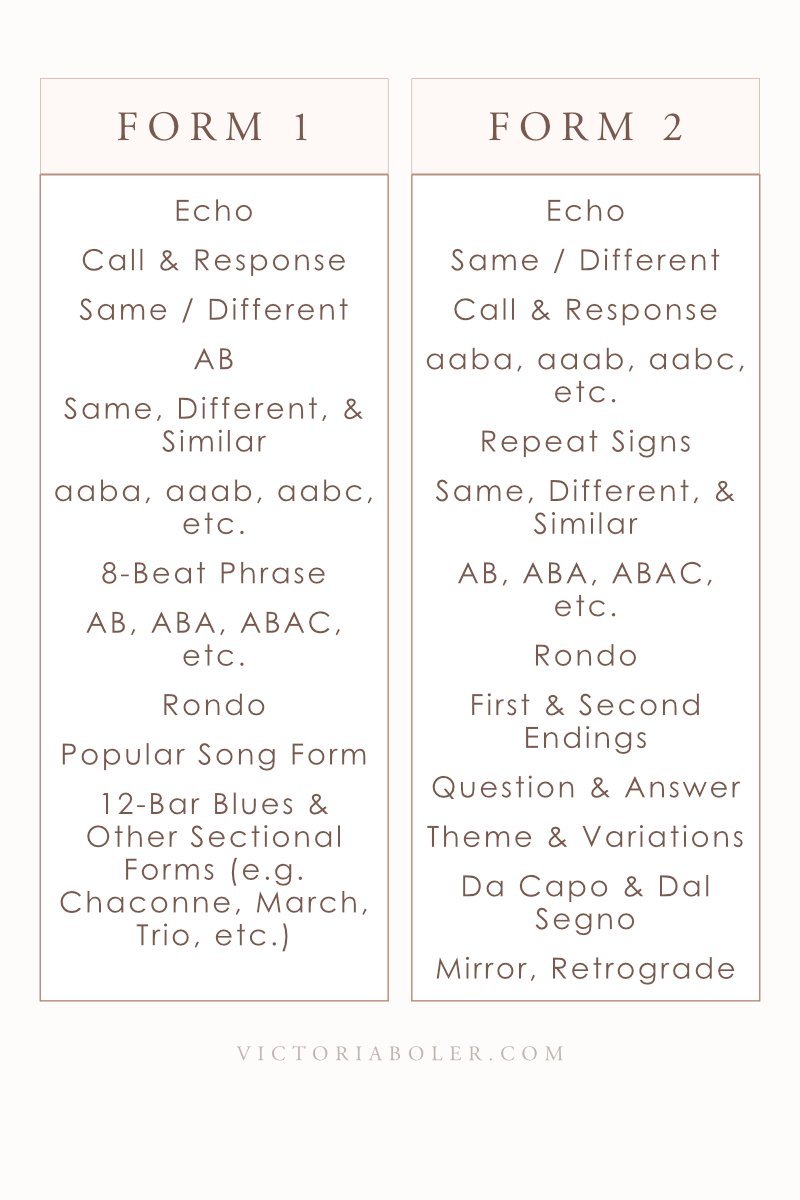
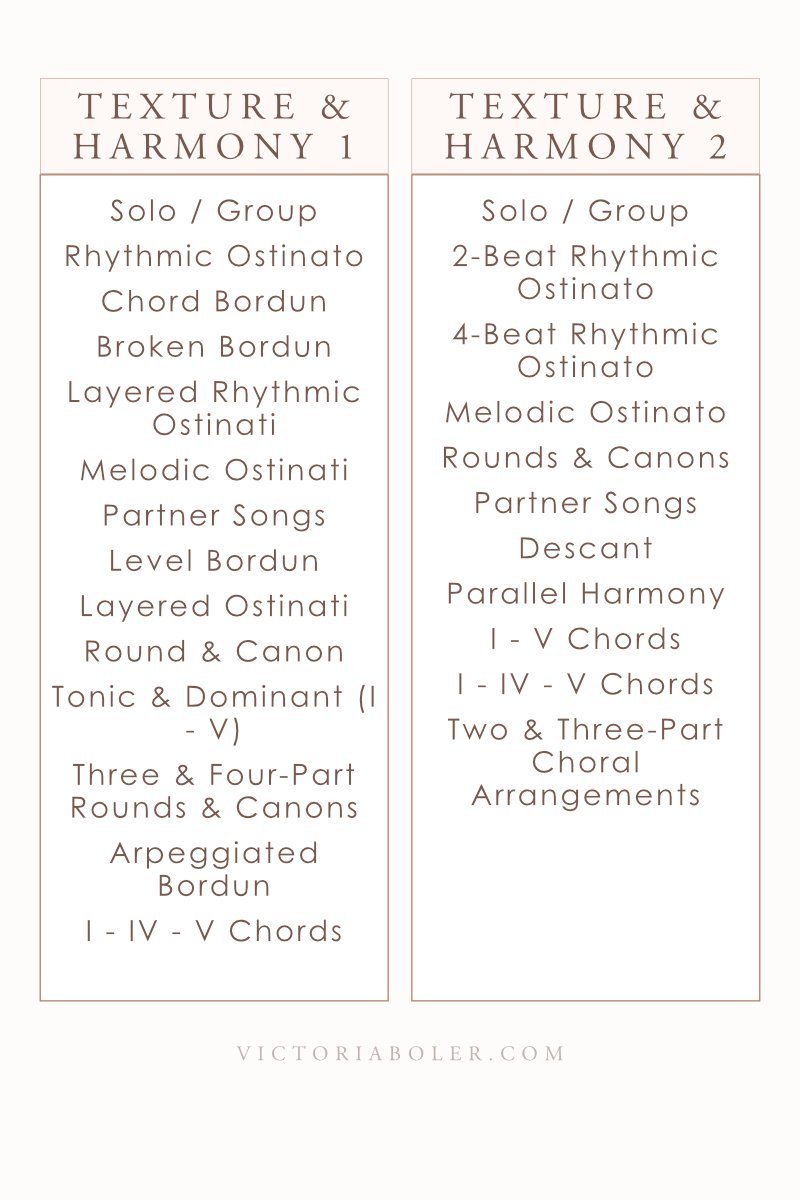
Form, Texture & Harmony
Other musical elements, such as form, texture, harmony, dynamics, etc., also arise organically from the repertoire.
However, we typically don’t see curricula grounded on these elements in the way we see them oriented around rhythm and tonal patterns.
Additionally, many of these micro-concepts arise as students are ready for them from a skills-based perspective. There is a natural physical, cognitive, and aural level readiness students work through on their way to things like arpeggiated borduns and parallel harmony.
Which One Should I Use?
Because each of these sequences is a skillfully-crafted progression of micro-concepts that are naturally represented in the repertoire, how might we go about choosing one to use?
I prefer the one we’re using inside The Planning Binder, but the good news is that rarely will we find ourselves stuck with one set of sequences we find on a website or in a textbook.
Year to year, school to school, and perhaps within a single semester, we can pivot and make adjustments based on what will work best for our students. Though consistency in the sequence overall will improve cohesive learning, we are largely free to adjust our focus based on student feedback.
Listen to Dr. Amanda Hoke talk about changing her melodic sequence in tomorrow’s podcast episode.
Considering a few options gives us a sense of the menu we have when looking for a spiraled progression of concepts for our programs.
Implications of a Sequence
Ultimately, that is one of the big implications for a teaching sequence.
The progression we choose will impact the repertoire we select.
The dance is also true in reverse: the repertoire we select will impact the sequence we choose.
With this lens, when we come across a fun activity we want to try, the question is not, “What grade is this song for?” The question instead becomes, “What previous knowledge or interaction is this song experience predicated on?”
What’s Missing Here?
There are many things missing from a curriculum outline like the one in this post!
Musical Content

From a content standpoint, there are plenty of concepts that exist in music that aren’t listed here at all! Music is a big subject to tackle and it extends far outside this document.
Howard Gardner commented that “the enemy of understanding is coverage,” and I think that is helpful here. By necessity, and for the sake of prioritizing understanding over coverage, we choose to consciously interact with some elements and not with others.
Musical Pedagogy
The other thing is when we start to think about what this document might look like in our classrooms, it becomes very obvious that there are a lot of things missing here in terms of musical actions.
This document tells us what students are learning, broadly speaking, but it doesn’t tell us what students are doing with this information. This gives us the content, not the instruction. We know we’re going to go far beyond reading and writing with these patterns and concepts, but that isn’t reflected here.
With each concept, there are so many ways we could actualize our knowledge with musical skills, and many different dimensions of social interactions and connections. We could also add things like enduring understandings or macro concepts or how we’ll show our learning with an authentic performance assessment. The opportunities for rich, lived, classroom experiences and curricular lenses are functionally endless.
What is Curriculum?
We tend to weave together a lot of things when we use the word, “curriculum.” Wiggins and McTighe talked about the Latin roots of the word “the course to be run.” Colleen Conway also talked about curriculum as being so much more than a document - we’re talking about what is taught, what is learned, and how we will move students through the learning process.
This document is limited on purpose.
It gives us a big picture of how musical concepts are spiraled throughout the program. In my opinion, it’s extremely useful because it gives us a way to streamline our decisions, that way we’re not stuck looking for fun activities to fill time in our lesson planning. The activities can lead to something that we know is leading to something else.
- Sources -
How to cite this article
Boler, V. (2023, July 9). Curriculum map for elementary general music. Victoria Boler.
Sources
I learned about the construction of this document from a music teacher named Mrs. Rogers when I was in my undergrad. Thank you, Mrs. Rogers!
Benedict, C. (2016). "Reading" Methods. In C. R. Abril & B. M. Gault (Eds.), Teaching general music: Approaches, issues, and viewpoints (pp. 347–367). essay, Oxford University Press.
Brandt, R. (1993). On teaching for understanding: A conversation with Howard Gardner. ASCD. Retrieved November 2022, from https://www.ascd.org/el/articles/on-teaching-for-understanding-a-conversation-with-howard-gardner
Bruner, J. (1960). The process of education. Harvard University Press.
Conway, C. (2015). Defining Musicianship-Focused Curriculum and Assessment. In Musicianship-focused curriculum and assessment (pp. 3–21). essay, GIA Publications, Inc.
Wiggins, G. P., & McTighe, J. (2005). Understanding by design. Association for Supervision and Curriculum Development.
Music Sequence Sources
Brumfield, S. (2012). First, we sing! Hal Leonard Corporation.
Eisen, A., & Robertson, L. (2005). Directions to literacy, teaching the older beginner: A teacher's guide to introducing music to the older beginner. Sneaky Snake Publications, LLC.
Eisen, A., & Robertson, L. (2009). Yearly plans: For coordinated use with an American methodology. Sneaky Snake Publications.
Eisen, A., & Robertson, L. (2010). An American Methodology: An inclusive approach to musical literacy. Sneaky Snake Publications.
Frazee, J. (2006). Orff Schulwerk today: Nurturing musical expression and understanding. Schott Music Corp.
Frazee, J. (2012). Artful - playful - mindful: A new Orff-Schulwerk curriculum for music making and music thinking. Schott.
Frazee, J., & Kreuter, K. (1997). Discovering Orff: A curriculum for music teachers. Schott.
Goodkin, D. (2013). Play, sing, & dance: An introduction to Orff Schulwerk. Schott.
Houlahan, M., & Tacka, P. (2015). Kodály today: A cognitive approach to elementary music education. Oxford University Press.
Klinger, R. (2014). Lesson planning in a Kodály setting: A guide for music teachers. Organization of American Kodály Educators.
Peek, Aimee Noelle, "A Comparison of the Kodály Methodology and Feierabend's Conversational Solfege" (2007). Theses and Dissertations. 27.
Rappaport, J. (2000). The Kodály teaching weave. Bel Canto Press.
Sams, R., & Hepburn, B. A. (2015). Purposeful pathways: Possibilities for the elementary music classroom. Music is Elementary.
Steen, A. (1992). Exploring Orff: A teacher's guide. Schott.
9 July 2023, 12:00 pm - Zapatitos Blancos: One Rhyme, Three Processes:
One of the joys of a repertoire and concepts-based curriculum is that we get to imagine songs and rhymes through many different lenses. This is what allows us to extend a song across several lessons in a single grade-level, and as we’ll talk about today, how we can extend a song or rhyme across multiple age groups.
Today we’re working with the Mexican children’s game, “Zapatitos Blancos.” This game is a hit from Kindergarten (and younger) all the way through 5th grade!

Zapatitos Blancos
Importantly, this game can stand alone as its own musical experience. Speaking the rhyme and playing the beat-passing game could certainly take up several lesson segments on its own!

To play the game, students sit in a circle with both feet extended.
One player in the middle pats a steady beat around the circle, tapping each person’s shoe as everyone speaks the rhyme. On the last beat of the rhyme, the person on whom the beat lands says how old they are. The beat continues around the circle for however old the student is. (For example, if the student is seven, the beat passes seven more shoes.)
When the beat lands on the final shoe, that person’s foot is eliminated from the game. They tuck it underneath them, out of the circle, so one foot is still in the game and one foot is out.
Continue through rounds as time allows.
Introducing the Rhyme & Game
Students can interact with the game to this rhyme at a few different levels in the first introduction. They might point around the circle with us as they listen. They might make a mental guess about what shoe the beat will land on. They might speak the numbers at the end.
When we introduce the game, the teacher sits in the middle of the group and points around the circle of shoes. Asking questions between each round is a great way to help students develop their own list of curious questions when they hear a new song or rhyme.
What do you notice about our rhyme?
Are there any words you recognize?
What do you think our rhyme is about? What makes you think that?
What else do you notice?
After several rounds, students may have pieced together some of the translation with known vocabulary words like “blancos,” “azul,” “anos,” and “tienes.”
In other situations, students may already know this rhyme and game from their own childhoods! If it’s already a known rhyme, this is a good time for students to share (if they would like to) how they learned it and who they play it with.
Let’s explore three different ways we might use this rhyme in an active music room: steady beat, form & movement, and improvisation.
Steady Beat
Steady beat is a natural curricular focus for this rhyme, given that the game itself is dependent upon a steady beat! After students know the game itself we can add a few layers of steady beat experiences in the preparation stage. These activities can be appropriate for kindergarten or first grade musicians, or whatever age group is working on steady beat.
Passing games take practice! Especially with young musicians, these are skills we can help develop through intentional scaffolding. Read about scaffolding passing games here.
“Mix & Match” Beat Development Activities
Unlike the activities we’ll discuss for older grades, these experiences serve more as a “mix and match menu” of steady beat development experiences. These interactions can last multiple weeks!
Though physical, aural, and visual preparation are often inextricably linked, we can highlight these skills in focused invitations.
Physical Experiences:

We might use any of the following physical experiences on their own, or we might choose a few to layer on each other as students are ready.
Speak the rhyme and play the game. When students are out…..
The eliminated student and the teacher play steady music on a tubano in the next round of the game
The eliminated students (without the teacher) play steady music on a tubano
The eliminated student points steady music on a shoe or shoe icon
The eliminated students track four shoes or four shoe icons
Aural Experiences:
We can pair or alternate some of the physical experiences with aural experiences as well. Here are some options:
Students inner hear the rhyme and point around the circle. Do all students end up on the same shoe at the end?
Ask: As we point around the circle, does our pointing speed up, slow down, or stay the same the whole entire time? Speak the rhyme and play the game, then students turn to a shoulder partner to discuss.
Ask: How many steady points do we do in our whole rhyme? Students speak and point around the circle while counting in their heads.
The game, the physical activities, and the aural activities complement each other as students develop beat awareness and beat-keeping skills over time!
Form & Movement
Depending on your students, these activities can be appropriate for 2nd grade musicians.
The movements in this particular form and movement sequence correspond to one sound on a beat, two equal sounds on a beat, one sound on a beat followed by a beat of silence, and one sound elongated over two beats.
These activities do not have to involve standardized Western notation, though they could! This will depend on where students are in their process of linking aural awareness to visual representation of sounds.
Experience 1: Movement Exploration
In the first experience we’ll introduce students to the B section of the rhyme, and explore shoe movements that we’ll build on later. Everything is predicated on an initial experience of speaking the rhyme and playing the game.
Zapatitos movements:

How could our shoes move?
The teacher models turning fingers into shoes and speaks:
Step step step step zapatitos step step. Motion for students to echo
Movement brainstorm:
Ooooo we can tiptoe. But I’m thinking of another way shoes can move… Oh I know! We can …..
(speak) Sliiide, sliiiide, zapatitos sliiiide. Motion for students to echo
At this point we might transition to staying seated but putting our feet out in front of us so students can move with larger muscle groups.
That was fun. I’m imagining something else… let’s stay seated and use our real shoes tooooooo….
(speak and move feet) Step step, step step, zapatitos, step step. Motion for students to echo.
After a few rounds, students suggest their own motions and the class tries them out
Experience 2
In the next class, or whenever students are ready to move on, we’ll start by reviewing our previous experience, and then extend the previous experience by asking students to come up with their own movement words in the B section.
Review previous class:
Speak the rhyme and play the game
Review ways our zapatitos can move (step, tiptoe, slide, etc.).
Ask students for suggestions of words to use
Non-locomotor movement:

Choose one movement for our zapatitos from students’ suggestions. Speak the rhyme while staying in place and stepping a steady beat. As a B section, continue to stay in place but add shoe movements:
Example: Twist twist, twist twist, zapatitos, twist twist or Waddle waddle, waddle waddle, zapatitos, waddle waddle, etc.
Try out several different student suggestions of movements.
Eventually narrow options to tiptoe, step, jump, and slide

Experience 3
When students are ready to move on (in the same class, or in a following class) we can explore traveling zapatitos after reviewing the previous experiences as necessary.
Locomotor movement:

All students speak the rhyme while standing in their spots and stepping a steady beat. A few students model how to move around the room in open space while speaking the rhyme.
The class discusses whether or not the students stayed in open space the whole time, and if they made adjustments to where the other students were as they were moving.
Repeat as necessary with different students and student groupings.
All students speak the rhyme while moving around the room in open space. At the end of the rhyme, the teacher displays a B section. Students stand in place and perform the stationary movements.
Repeat with other movement options.
This movement activity is versatile - we can circle back when students are working with standardized Western notation, or leave the experience here. Importantly, activities like this involve students in creative musical thinking as we wonder how our shoes can move and then extend our ideas to locomotor movement and improvisation within specific parameters.
Rhythmic Improvisation: Body Percussion & Barred Instruments
This activity is from the 2022 - 2023 Planning Binder curriculum, in the Older Beginners concept plan. These experiences happen after students have spoken the rhyme and played the game. This is also not students’ first experience with improvisation.
These interactions also begin with movement in open space, similar to the activities in the previous section.
Experience 1:
After students have spoken the rhyme, played the game, and clapped the rhythm of the words, we can extend the rhythm vs beat work by asking them to clap the rhythm of the words while stepping the steady beat.
Rhythm vs Beat:
Clap the rhythm of the words while stepping the steady beat in place
When students are successful doing this in place, they can make their movements travel around the room in open space.
Echo Improvisations:
Students step the beat and clap the words in open space, then stand still as the teacher claps eight beats. Students echo, then speak the rhyme and move in open space again.
Experience 2:
When students are ready, we’ll extend the traveling rhythm vs beat work to also incorporate some improvisation.
Review:
Speak the rhyme and play the game.
Review walking around the room in open space, stepping the steady beat and clapping the rhythm of the words
Echo Improvisations:
Students step the beat and clap the words in open space, then stand still as the teacher claps eight beats. Students echo, then speak the rhyme and move in open space again.
Improvise a Response:
When we see that students have the flow of the activity, we can add another layer of improvisation by asking students to improvise their response instead of echoing the teacher
Aurally Identify:
After several repetitions, students choose their favorite one of their improvisation responses. Lead students in playing their improvisation a few times so it’s memorized.
Students figure out their rhythm on rhythm syllables by thinking of how many sounds they are using on each beat.
When students are ready, they teach it to a nearby friend.
Experience 3:
The previous experiences can take several classes, or perhaps one class, depending on the students! If students are ready for an extension, we can transfer our improvisation experiences to barred instruments.
Review:
Review speaking the rhyme while walking in open space, then improvising their own response to the teacher’s rhythm

Take a Walk:
For this activity, instruments can be set up in any mode or tonality - this is a nice time to explore a mode students haven’t had much experience with. D Dorian is a great option for this - we can set up in D dorian by taking off the lowest C.
Seated in pairs behind a barred instrument, students take turns “walking” their mallets up and down the bars. If we imagine our mallets are little white and blue shoes, what does it sound like to gently step or tiptoe up and down?
Bordun:

Both partners speak the rhyme together. As they speak, one person claps the rhythm of the words and the other plays a steady beat chord bordun.
As a B section, the clapping partner improvises eight beats and the partner behind the instrument gently clicks their mallets to echo their partner’s improvisation.
Switch jobs so both partners have a chance to play the bordun, and to improvise a clapped rhythm
Barred Instrument Improvisation:

Repeat the activity. This time, the clapping partner improvises an eight-beat rhythm and the partner at the barred instrument improvises a new melody to their partner’s rhythm.
Switch jobs so both players have a chance to improvise a rhythm and a melody
With each new lesson segment, we build and extend on previous experiences. This is one of the keys to helping older beginners be successful with improvisation. Transferring improvisations to barred instruments adds another layer of student choice and peer interaction. The collaboration in this activity is part of what makes it so enjoyable for older beginners!
Rhythm, Movement, & IMPROVISATION
A game like “Zapatitos Blancos” can hold our attention for many weeks! There are endless possibilities for this rhyme across multiple grade levels and woven throughout multiple classes.
When we use repertoire as a jumping-off point for developing knowledge and skills, there are opportunities to explore ideas like steady beat, movement, and improvisation through a play-based lens.
10 June 2023, 10:33 am - Apple Tree Writing Activities using Depth of Knowledge (DOK)
If we were to walk into an active music room, we would see students singing songs, playing games, moving, and playing instruments, among many other things.
Where does writing fit into an active music room? In addition to copying notation, how can we use writing notation as a part of the learning process so students are equipped to showcase the results of their learning?
Today we’ll explore possible ways to go deeper with writing activities in an active music room, using a framework called Depth of Knowledge.
All the resources in this blog post will be available to download at the bottom of the post.
Let’s jump in!

Writing Music: Beyond Paper and Pencils
For our purposes today, I define writing as using a visual symbolic representation of an aural event that can have a shared meaning between musicians.
Most of the time in music, we are familiar with writing in the context of using a paper and pencil to notate a musical expression through standardized Western notation.
That is certainly a form of writing students will use in an active music class! Extending this idea, however, we have many opportunities to show how musicians depict aural sounds through visual media.
Standard Western notation on a piece of paper is one out of many valuable pathways of visual expression. Let’s look at other ways of showing a visual representation of an aural event, specifically with melodic and rhythmic phrases.
Melodic Writing:
Finger in the air to paint melodic contour
Draw the melodic contour shape on the board
Drag icons on the board to show the melodic contour
Body solfege signs and solfege hand signs
Stick notation with solfege letters underneath
Hand staff
Showing stems up or down with a fist and palm
Solfege buttons
Popsicle sticks
Five-line staff worksheet with pencil or other manipulatives (erasers, bingo chips, etc.)
Rhythmic Writing:
Finger in the air to write rhythms or show long and short sounds
Drag iconic notation over steady beat strips
Popsicle sticks
Human rhythms
Rhythmic building blocks
Rhythmic building blocks
Paper and pencil
Which Way is Best?
Since there are many legitimate ways to notate music, the question of which one to use may not be dependent on which one is the best. Instead, it will likely come down to the purpose of the activity.
Do we need a quick, tactile way to reinforce a visual representation of long and short sounds? Using our fingers to trace long and short lines in the air can be a great way to accomplish this. Are we asking students to aurally identify the solfege to a known song? If so, we might ask them to drag icons on the board to show the melodic contour. Are we interested in doing an extended composition activity across multiple lessons, where students will share their work with another group? Writing with a paper and pencil is a great way to preserve a musical thought and save it for another day.
Not all of these examples use a paper and pencil, but they do link a sonic event with a visual representation. The use case for each writing option will depend on the function the activity needs to serve in the overall learning process.
Depth of Knowledge (DOK) and Writing Activities for Elementary General Music
While we use each of the activities above to develop the same skill (writing), we can ask students to show a different DOK, or depth of knowledge depending on how the activity is implemented.
What are the Depth of Knowledge levels?
Depth of Knowledge is a framework we can use to help ascertain the level of understanding students have about a given topic. The levels range from memorizing information (level 1) to transferring and adapting knowledge in a new situation (level 4). Each level of knowledge goes deeper into the cognitive demand students need to take on in order to complete the learning task.
Let’s look at the levels and apply them to a potential music education setting, focused on writing.
DOK 1: Recall and Reproduction - Students acquire knowledge
When students write music, DOK 1 activities might look like copying notation on the board or on a worksheet.
DOK 2: Skills and Concepts - Students use their knowledge to solve problems
As students write music, they might be asked to fill in a missing measure with the correct rhythm or transfer a melody to a new placement on the staff
DOK 3: Strategic Thinking - Students use their content knowledge to analyze material
In a music writing activity, we might ask students to find the mistake in our notation and correct it, explaining their thinking and how they arrived at their answer. We might also ask them to dictate a new musical phrase they have never heard before.
DOK 4: Extended Thinking - Students augment their knowledge by thinking about how else their learning might be used in a new situation. This often involves a project that takes up more than one class period and incorporates other skills or subjects.
We might ask students to transfer and extend the use of their content knowledge by notating their own musical ideas.
Apple Tree Writing Activities using DOK
Apple Tree is one of my favorite singing games of all time! Students love the game that accompanies this song, and there are many possibilities for expanding musical understandings and experiences with the simple melodic and rhythmic content.
The Game:

There are many versions of this game! The one I use is played similar to London Bridge:
Two students take hands above their heads to create an arch. The class steps a steady beat in a circle and sings the song, walking under the arch created by the two students. At the last word of the song, “out,” the students who created the arch lower their hands, capturing one student between them.
Potential Writing Use:
There are many ways we might use this song to develop writing skills in the elementary general music room!
Rhythmically, this song lends itself to exploring steady beat, long and short sounds, rhythm vs beat, ta & ta-di, and 2/4 meter. Melodically, we can use this song to develop sol and mi, and sol-la-sol-mi patterns.
Let’s look at some possible ways to link writing activities with the DOK framework.
All of these activities would take place in conjunction with other play-based, active experiences, and not as the sole learning activities in and of themselves.
Rhythmic Writing Activities
These activities range from imitation to creation.
DOK 1: Trace the Melody
After singing the song and playing the game, students sing the song on rhythm syllables and clap the rhythm of the words. Next, with the notation on the board, students use their fingers in the air to trace the rhythm of the song as they sing.

Explanation: I categorize this as a DOK level 1 because students are being asked to copy existing notation. The goal of this writing activity is imitation.
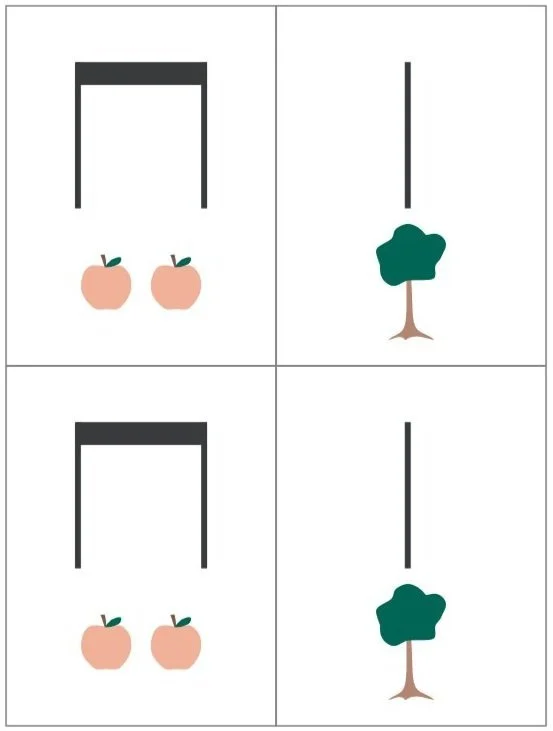
DOK 2: Notating the Rhythm
The teacher speaks a rhythm using apple and tree, or ta and ta-di. Students notate the order the teacher speaks using printed cards with apples, trees, and rhythmic notation.
Consider speaking the known song patterns first (ta-di ta ta-di ta and ta-di ta-di ta-di ta) before moving to unknown combinations.
These cards are available as a printable PDF and a Google Slides presentation at the bottom of this concept plan.
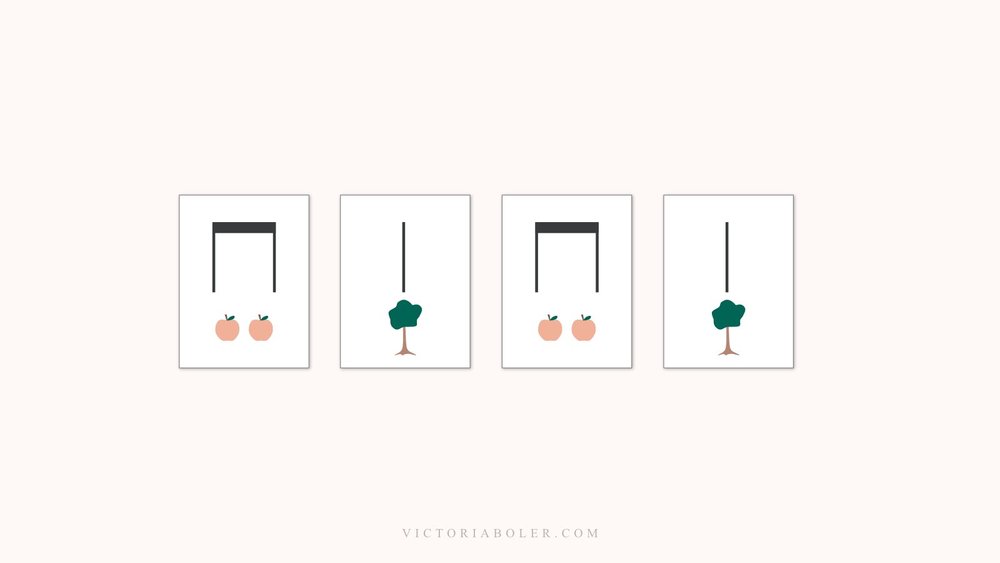
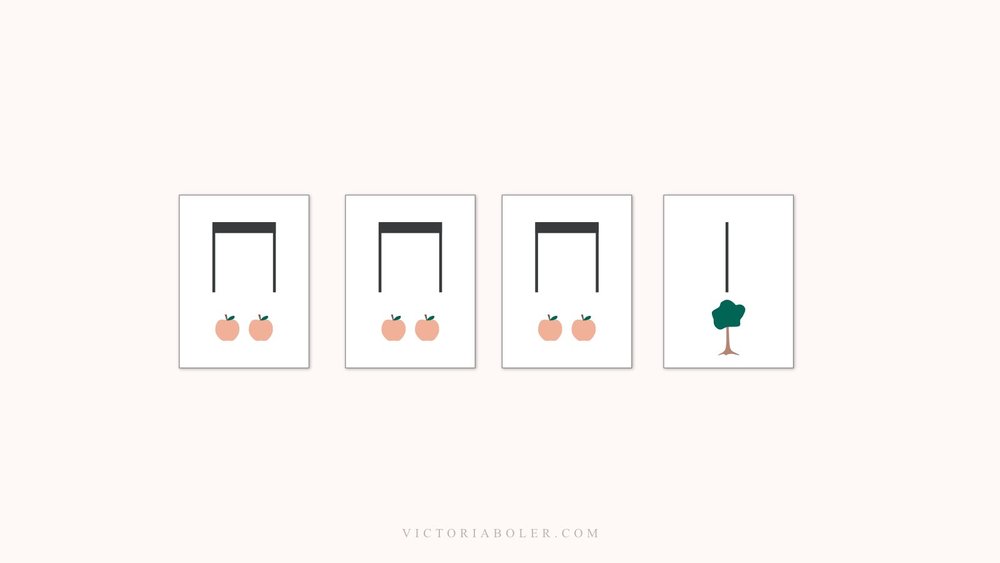
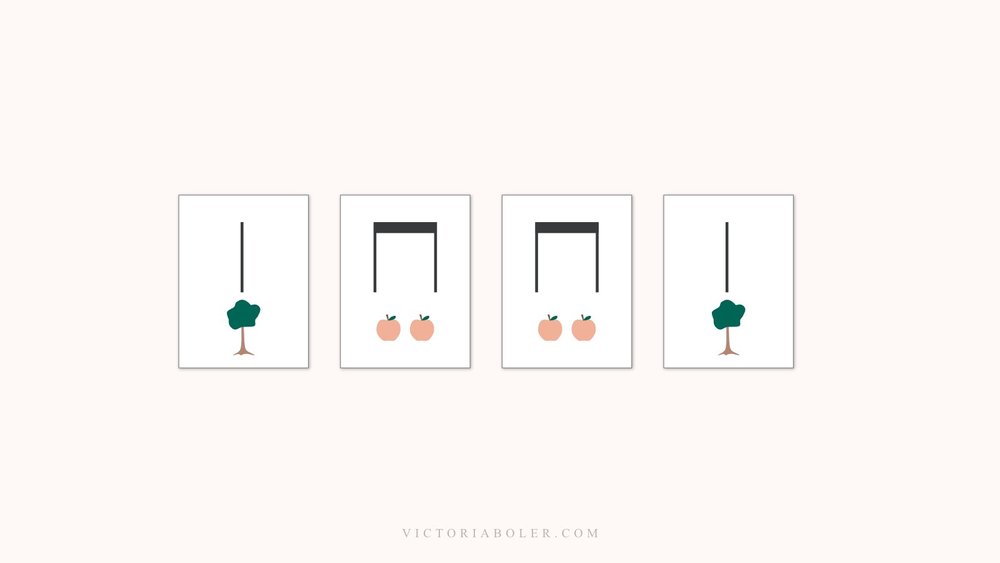
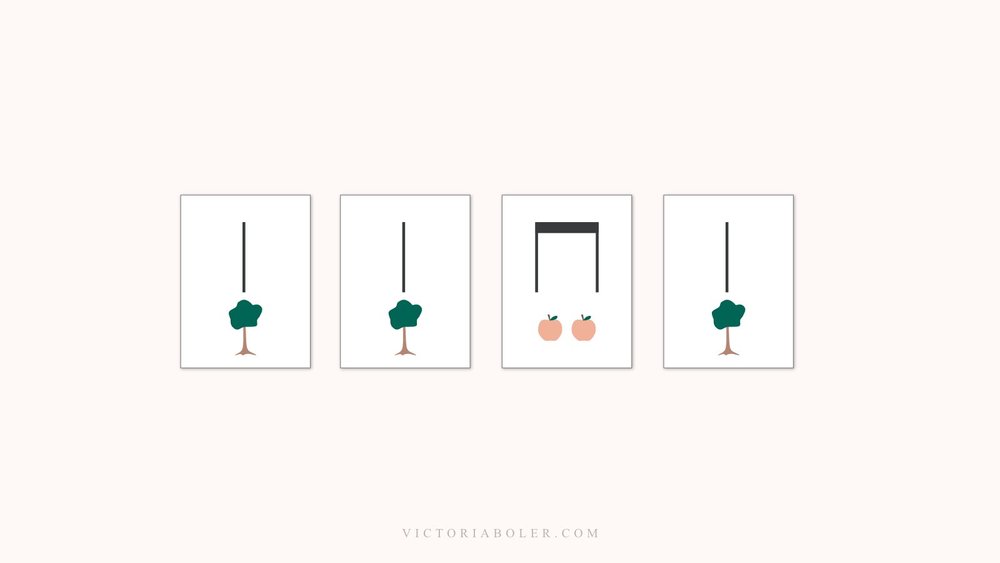
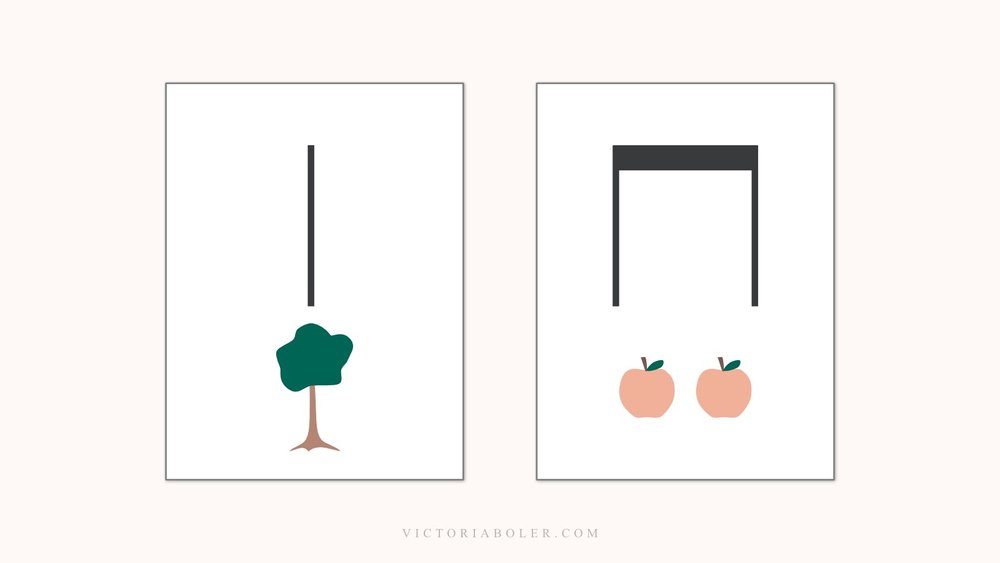
Explanation: In this writing task, students apply their knowledge of sounds on a beat to recreate rhythmic phrases. These patterns move from contextually familiar rhythms (the ones taken from the song) and unfamiliar rhythms (ones the teacher creates). Even though students write unfamiliar combinations, the teacher supplies the correct answer by speaking the rhythm out loud. Further, the cards are supplied for students with the rhythms and rhythmic icons already provided.
DOK 3: Arranging Rhythms

What could we make with all these apples?! Students come up with their own ideas, and then eventually the teacher narrows in to the list on the board:
Apple pie | Apple pudding | Baked apples | Cider
With a partner, students clap the rhythm of the words on the board to figure out their rhythms by ear. With blank cards cut out, students write the text, notate the rhythms in stick notation, then choose an order of cards to perform with their partner.
The image below on the left shows the rhythmic text students will notate. The image on the bottom right shows the accurate notation of the rhythms with stick notation. The image on the right with the correct rhythmic notation would not be displayed during the writing activity.
View fullsize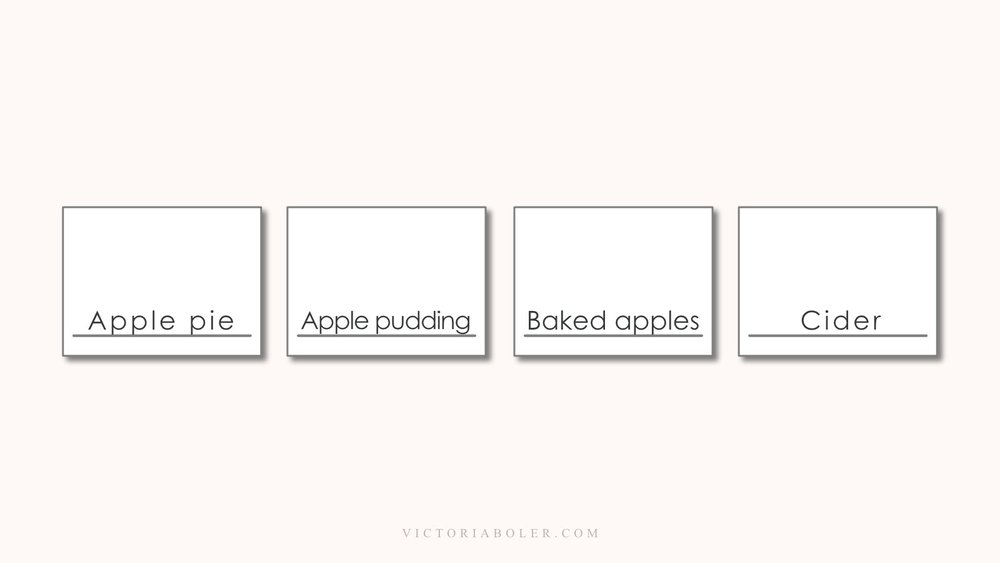
View fullsize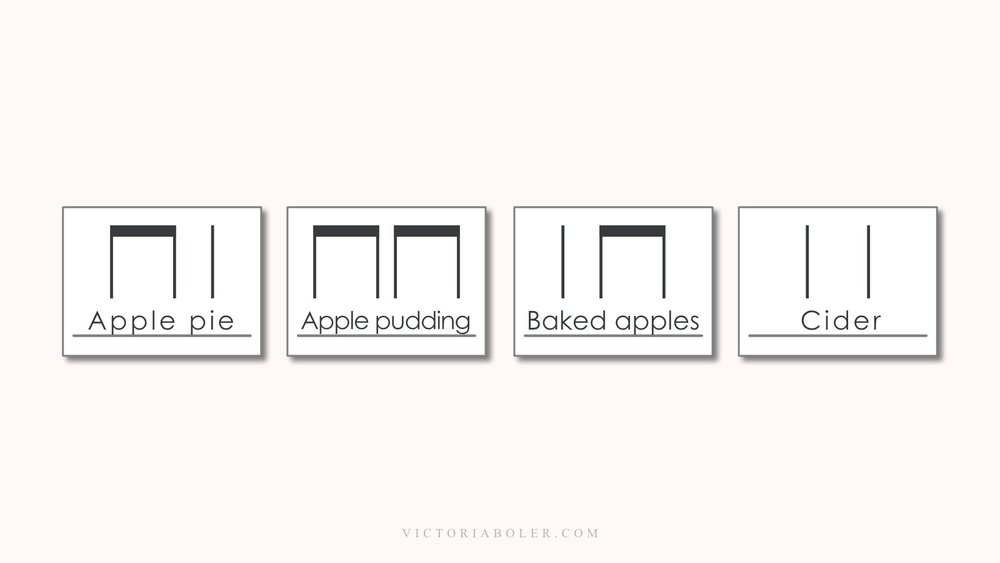
Explanation: Here, students write unfamiliar rhythm combinations outside the known phrases in the song, “Apple Tree.” Students write the rhythms by ear, without referencing existing notation on the board. They then notate their own order of cards to create a rhythmic arrangement.
Melodic Writing Activities
Let’s look at some possible ways to explore writing melodies based on “Apple Tree.” Like the rhythmic activities, these learning tasks range from imitation to creation.
DOK 1: Copy the Melody
In these worksheets, students directly copy the melodic fragments from one five-line staff to another. One worksheet has only noteheads. The other includes rhythmic stems.
These are available for download at the bottom of this blog post.
View fullsize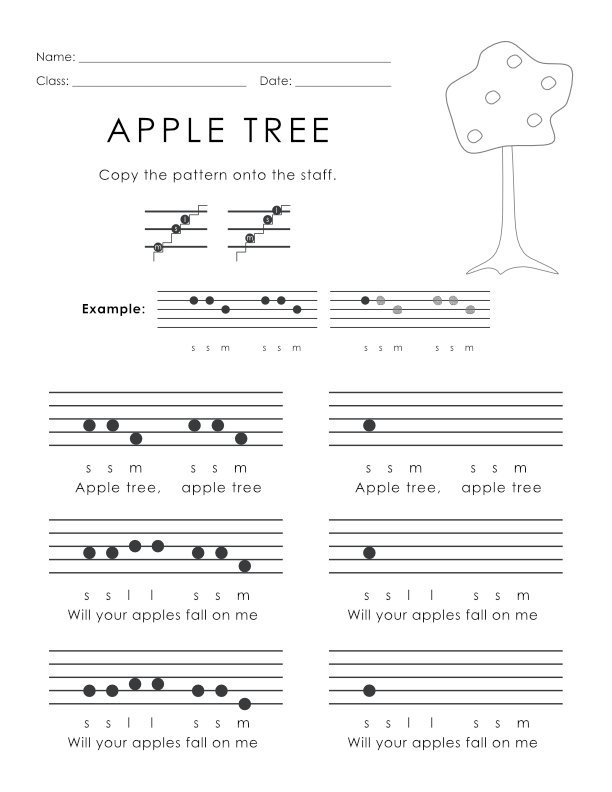
View fullsize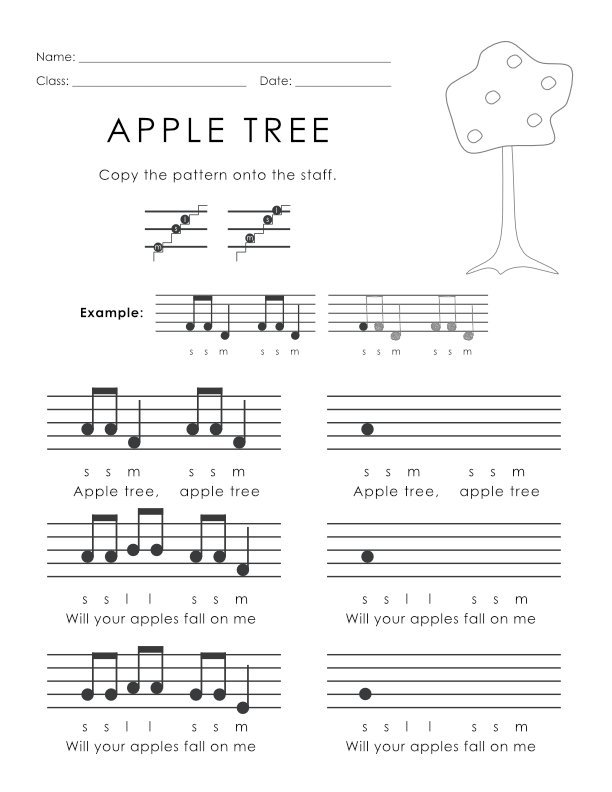
Explanation: I categorize this as the lowest depth of knowledge invitation because students are asked to re-write melodic information already provided on the worksheet. The task here is to accurately reproduce the melodic fragments.
Though both of these worksheets utilize imitation, the worksheet with rhythmic stems in addition to melodic noteheads incorporates more information. Students might choose which worksheet they would like to complete.
DOK 2: Notate Transposed Melodies
After singing the song on solfege syllables while playing the game, students notate the melody by pointing to a hand staff.
Because there is not a clef on this staff, any line or space can correspond to any solfege syllable. This allows students to practice transposing the melody to many different positions.
After students have practice writing the melody in several keys following the slides on the board, the teacher displays the empty hand slide and asks students to notate the melody starting on a new line or space.
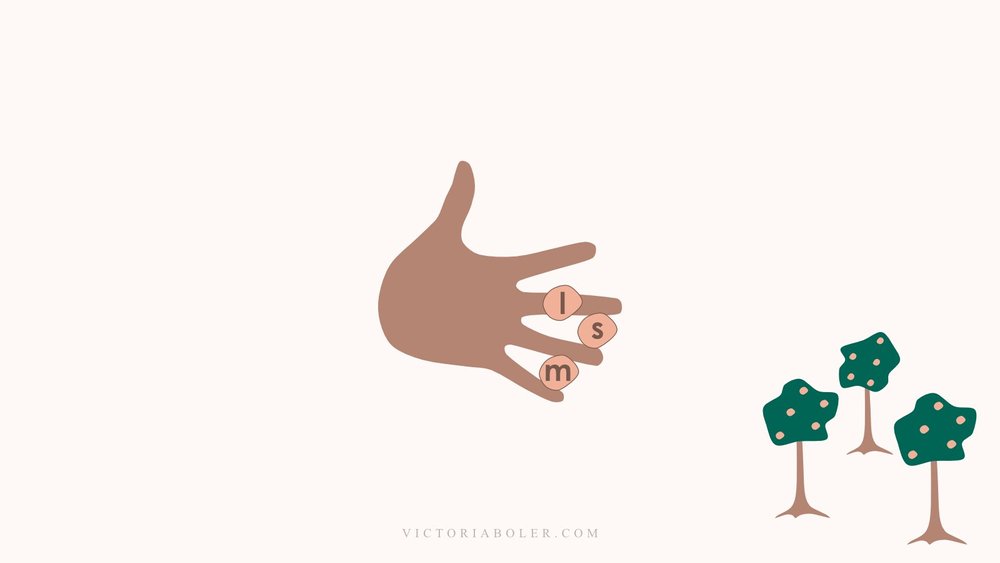
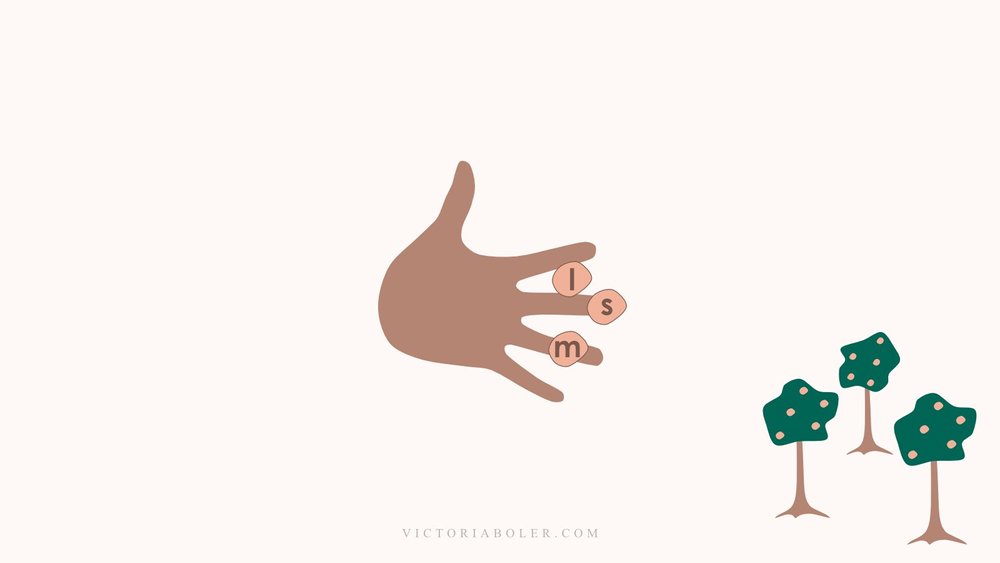
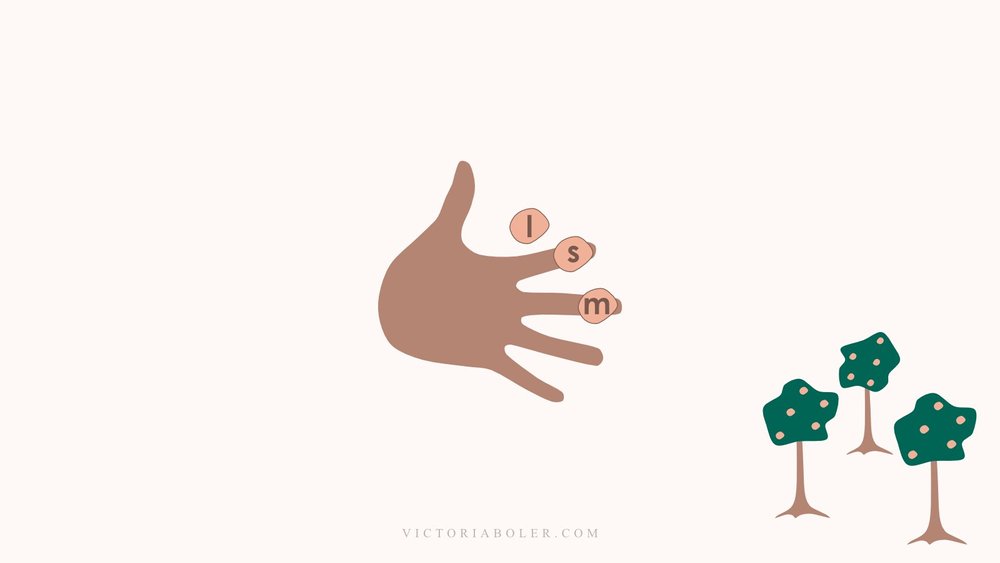
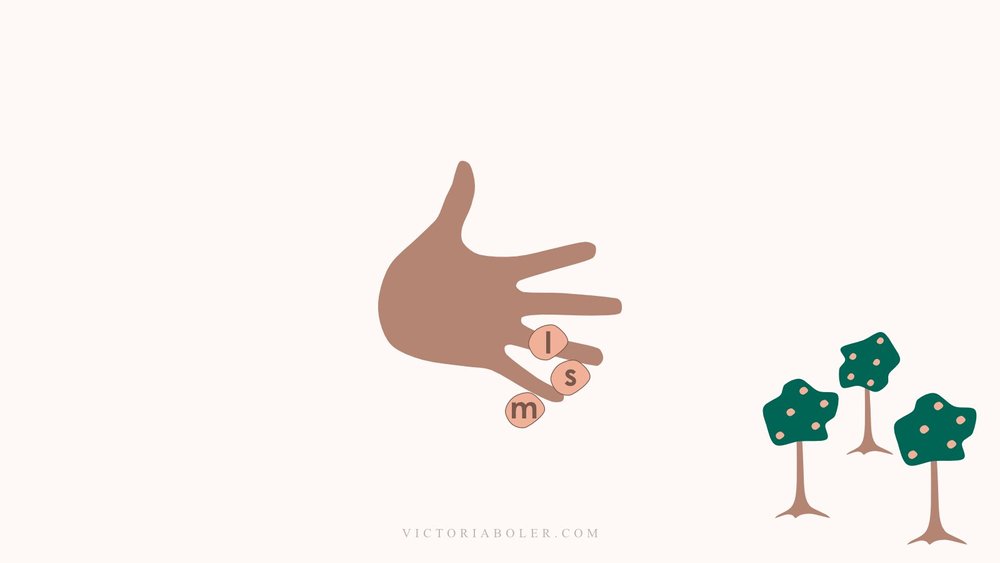
Explanation: In this task, students move from copying the melody on the hand staff to transposing the melody to a new location.
View fullsize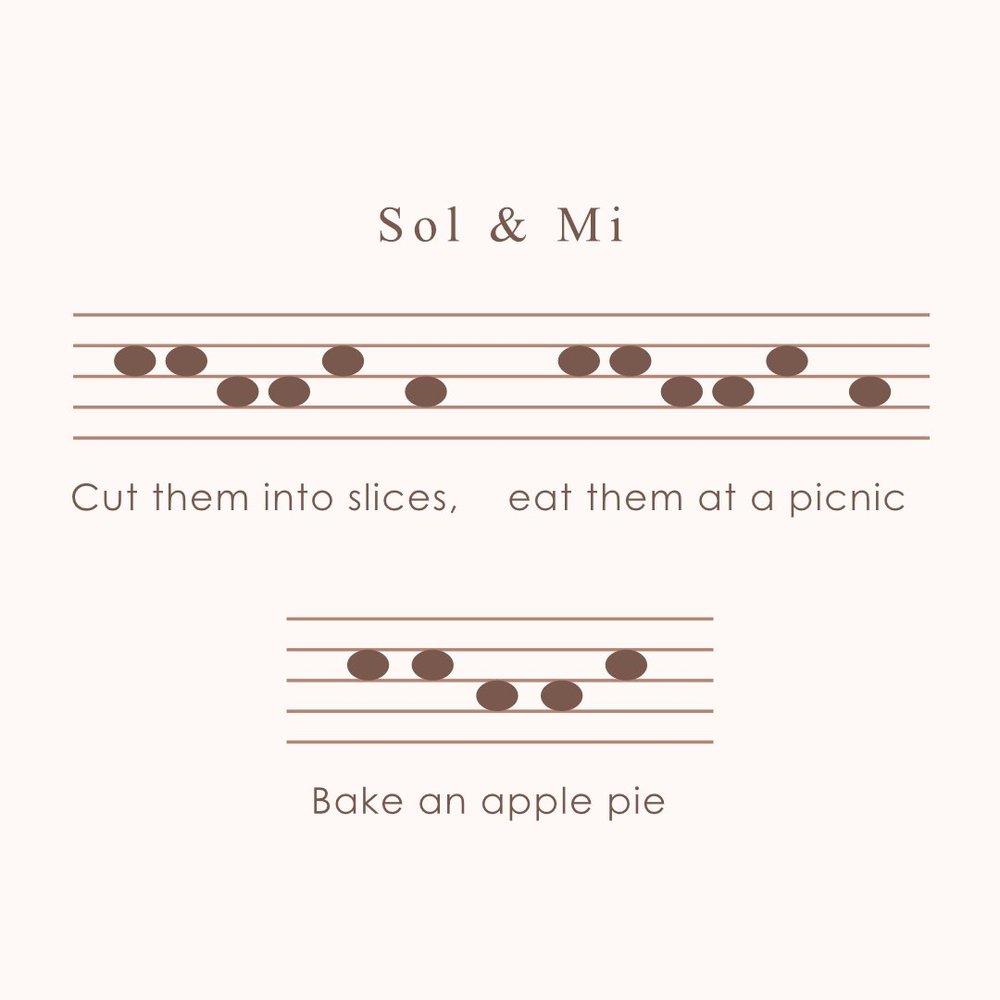
View fullsize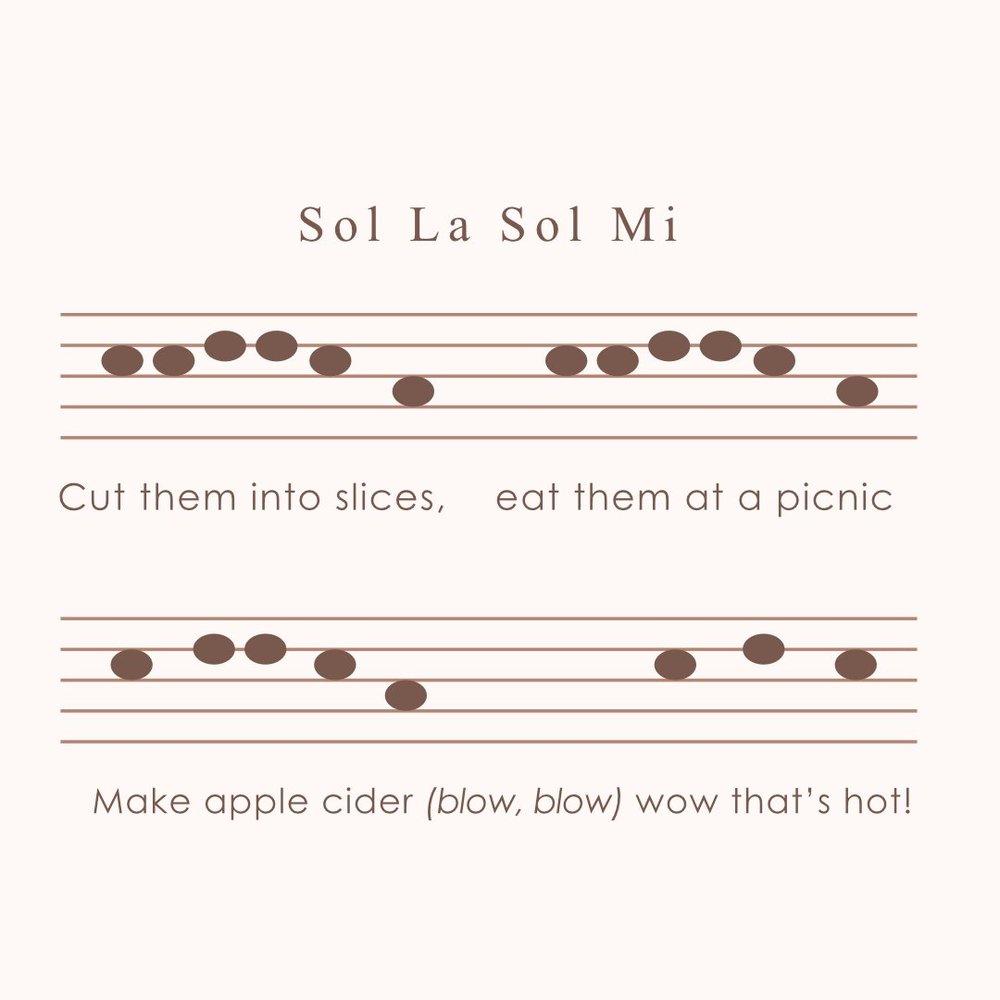
DOK 4: Apple Compositions
What might we do with all these apples? Over the course of two or three lessons, students develop an apple composition idea, notate it, practice, and eventually share it with their peers.
Students begin by imagining what they might do with the apples that have fallen to the ground from the song:
We could cut the apples into slices and eat them at a picnic.
We might bake an apple pie.
We could make apple cider - but be sure to blow on it because it’s hot!When students have their ideas, they turn to a partner. Together, both students figure out a way to sing the idea with solfege hand signs and a sol and mi melody, or a sol-la-sol-mi melody, depending on the learning target for the song.
With their melodies created, students are ready to write them down on the five-line staff.

When their melodies are notated, partners can choose if they’ll perform their compositions with one of the following options, or a combination of options:
Singing on solfege with solfege signs
Singing on text
Singing with movements they create to act out the text
Singing and playing the melody on barred instruments
After students have had time to practice, groups pair with another group and share their apple compositions.
Explanation: I categorize this task as level 4. Writing is an important part of the task, but it is one piece of the assignment that calls for students to collaborate and perform their compositions. Instead of copying or altering existing notation, students create the melody they write and choose where to notate it on the staff.
When students notate a visual representation of music, they capture a musical moment and preserve it in time. This is one of the many ways we help students communicate musical ideas and move toward musical literacy.
Proficiency in notational writing is a skill young musicians can work on and advance over time. When we design writing tasks through the lens of the Depth of Knowledge levels, we can develop creative writing invitations that bring students closer to notating the sounds they hear around them, and equally important, the music they create themselves.
References & Further Reading:
Aungst, G. (2014, September 4). Using Webb's depth of knowledge to increase rigor. Edutopia. Retrieved February 10, 2023, from https://www.edutopia.org/blog/webbs-depth-knowledge-increase-rigor-gerald-aungst
Francis, E. M. (2017, May 18). What is depth of knowledge? ascd.org. Retrieved February 10, 2023, from https://www.ascd.org/blogs/what-exactly-is-depth-of-knowledge-hint-its-not-a-wheel
McTighe, J., Doubet, K., & Carbaugh, E. M. (2020). Designing authentic performance tasks and projects: Tools for meaningful learning and assessment. Hawker Brownlow Education.
15 February 2023, 10:00 am - Physical Preparation Activities for Elementary General Music
In music education, the learning phases of preparation, presentation, and practice are unique to the Kodaly framework of teaching and learning. As a part of the preparation phase, teachers lead students through a process of experiencing the target musical pattern without the Western theory musical label or notation.
Physical preparation is a key component of this experience-based learning sequence. Today we’ll explore possible ways to explore rhythmic and melodic elements through the lens of physical preparation activities.

Why Use Preparation?
The preparation process begins with intentional experiences, without using the standard Western notation or the standard Western name for the target musical pattern. This teaching sequence may leave some educators wondering why. Why not just call the sound by the name we’ll use in class later (quarter note, do, etc)? Why not just show the Western notation right at the beginning of the learning process?
Many thoughtful pedagogues do present the name and notation with the sound right away! Presenting the name, sound, and symbol for a melodic or rhythmic concept in the first experience is a valid way of teaching music that can serve students well and develop interdependent inquisitive, and sensitive musicianship.
One of the benefits of walking through the preparation process without the standard Western notation or symbol as the leading vocabulary right away is that it makes room for other descriptions of the sounds.

Students are encouraged to notice and explore the qualities of the sound by engaging in active experiences and making inquiries. Active experiences can include singing songs, speaking rhymes, playing games, playing instruments, moving, collaborating, and creating. Inquiries students might investigate can include questions like Is this pattern long or short? Is it high or low? How much longer or shorter is it compared to other sounds we know? How much higher or lower is it than other sounds we know? Have we heard this pattern in other pieces of repertoire?
In the process of experiencing and inquiring, students use their own language and vocabulary to describe the sounds they hear and make meaning of the patterns. When the teacher shares the common classroom vocabulary, students have already developed the definition.
This process of teaching and learning can be about active experiences, thoughtful descriptions, creative collaboration, and analytic thinking. It is a framework to listen, compare, and apply.
Models of Preparation
One of the beautiful things about any teaching viewpoint is that practitioners who follow it are not monolithic in their embodiment of the approach. While their descriptions of this phase are not opposing, Kodaly thinkers have discussed this phase of learning slightly differently.
Anne Eisen and Lamar Robertson, and Mícheál Houlahan and Philip Tacka group preparation experiences into physical, aural, and visual activities, with physical activities as the first step.
Susan Brumfield groups the process into early, middle, and late preparation. She describes the progression as play (early), recognition, identification, and description (middle), and summarization and representation (late). Brumfield lists aural activities as the first step (p. 13).
Lois Choksy’s work described preparation activities as preparing students “subconsciously through singing and hearing the new rhythmic or melodic turn in a variety of musical settings” (p. 172).
While authors are not uniform in their approach to preparation, the common thread in each of these works is the practice of experiencing a musical element before it is made conscious.
For our purposes today, I’ll consider physical activities to be early experiences in preparation.
Physical, Aural, & Visual Pathways of Musicing
If we were to look at our teaching processes through the lens of Universal Design for Learning, we might decide we want more than one way to represent a musical idea. Physical expression, aural awareness, and visual depiction are three pathways of musicing we explore in preparation.
These learning pathways are sometimes referred to as learning styles or learning modalities. Certainly more than these three styles of learning exist, and students are not locked into one single way of musical knowing. Many educational researchers agree that there is not sufficient research to support learning styles as a significant deterrent or accelerator of learning, at least in the way we have traditionally used them (read studies 1 2 3 4).
In my opinion, the reason to use physical, aural, and visual pathways for preparation has less to do with learning styles. It has more to do with how music exists naturally in the world and how learners take in sensory information.
In my view, music naturally falls into the categories of an action we physically take (to sing, speak, move, or play), a sound we perceive, and a visual representation we can see. These are the sensory experiences we have as we music.
What does music feel like? What does it sound like? What does it look like?
Physical activities are often the first preparation experiences we explore with a new element.
Physical Preparation
We center physical preparation when we emphasize how music feels in our bodies.

From a sensory perspective, what does it feel like for a melody to move down? What does it feel like for a melody to end on the home, tonic pitch? What does it feel like to have a long sound stretched over two beats? What do short sounds feel like?
The use of these experiences will be different depending on the extent to which students are asked to imitate the teacher, and the extent to which they are asked to analyze and embody the information on their own.
For example, students might echo the teacher’s rhythmic clapping patterns using one and two sounds on a beat. After this experience, we could get additional information from students about how they are internalizing one and two sounds by asking them to create a clapping pattern with a partner using the same rhythm.
Both of these experiences utilize a physical action, but they demand different levels of ownership on the part of students.
Which is Which? Combining Physical, Aural, and Visual Ways of Experiencing
Because music is naturally embodied through physical, aural, and visuals modes of expression, very often these categories will blend together.
If the teacher plays a collection of long and short sounds on recorder and asks students to move to what they hear with steps for the long sounds and tiptoes for the short sounds, students will rely on their aural awareness to hear the changes in length. They’ll embody the sounds physically as they tiptoe and step. And they’ll be able to visually see the other student-musicians tiptoe and step as well.
Even though we focus on one specific sensory way of knowing when we engage in physical preparation, all musical interactions naturally involve physical, aural, and visual modes of experiencing music.
Pedagogically, the label we put on an activity will depend on the primary purpose of the event and what we want students to focus on.
Physical Preparation for Rhythmic and Melodic Elements
Rhythmic and melodic elements will be experienced differently when we do physical preparation activities.
When we prepare rhythmic concepts through physical activities, we’ll focus on how the length of the sound feels, especially in relation to the steady beat.
When we prepare melodic concepts through physical activities, we’ll focus on the how high or low the sounds feel in the melodic contour of a phrase.
Here are example activities for physical preparation of a rhythmic or melodic element. In each of these examples, students would focus the activity on a specific target phrase of the song, not necessarily the song in its entirety. A target phrase is a phrase or sub-phrase of the song that has the target rhythmic or melodic element, surrounded by other known elements.
Rhythm
Clap the rhythm of the words
Put the rhythm of the words on body percussion (with a partner, with a small group, or individually)
Partners create two different ways to play the rhythmic phrase with body percussion
Play the rhythm on unpitched percussion instruments like hand drums or rhythm sticks
Play the rhythm on pitched percussion instruments
Create a steady beat body percussion pattern (with a partner, with a small group, or individually). Half the class plays their steady beat pattern. Half the class plays their rhythm body percussion
Tiptoe, step, and slide the rhythm of the target phrase in open space around the room
Clap a target word, sing the rest of the song
Melody
Students copy the teacher’s motions to show melodic contour of the target phrase
Paint the melodic contour with a melodic paintbrush (imaginary paintbrush in the air) and put the paintbrush in several places (nose, elbow, ear, shoe, etc.)
Point to spatial icons to represent the melodic contour (dots on the board, a tone ladder, melodic stairsteps, or a barred instrument)
Point to objects in the room to represent the melodic contour (such as a window and scrap piece of paper on the floor for high and low)
Play the melodic contour with body percussion using high, middle, and low levels
Example: “Frog in the meadow” becomes snap snap snap clap pat
Example: “Come through in a hurry” becomes clap clap pat clap snap
Move to the melodic contour while traveling in open space (individually or with a partner)
Find three different ways to show the melodic contour through movement. Pick your favorite.
Play the melody on a barred instrument
Sing and point to a hand staff, copying the teacher
physical preparation In Action:
What might these examples actually look like?
Here are two songs with physical preparation activities to try.
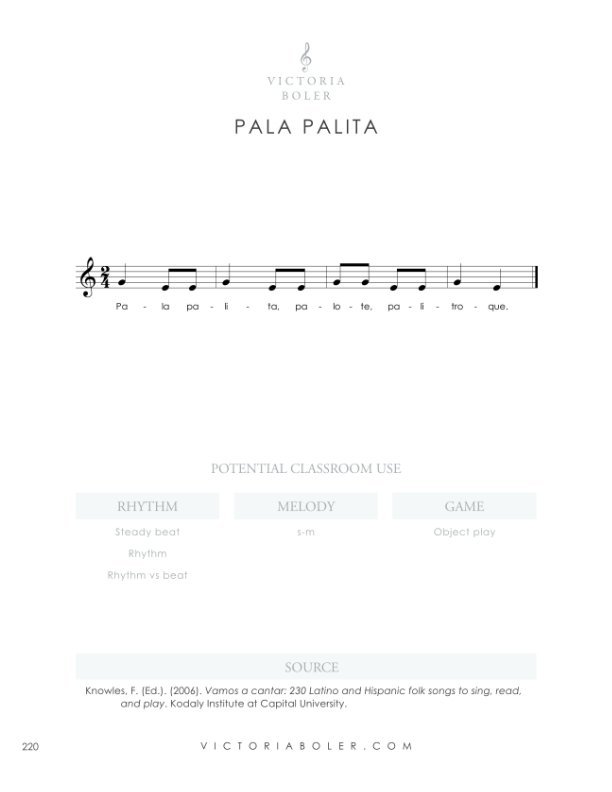
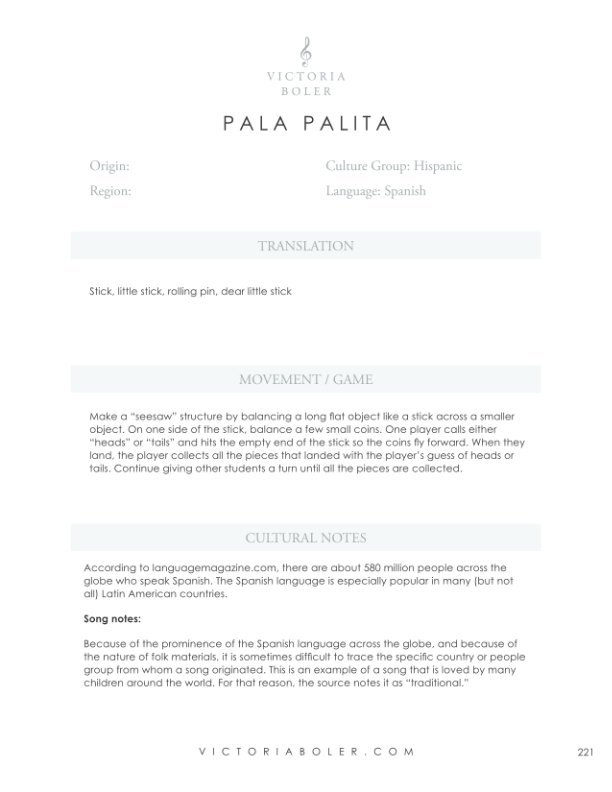
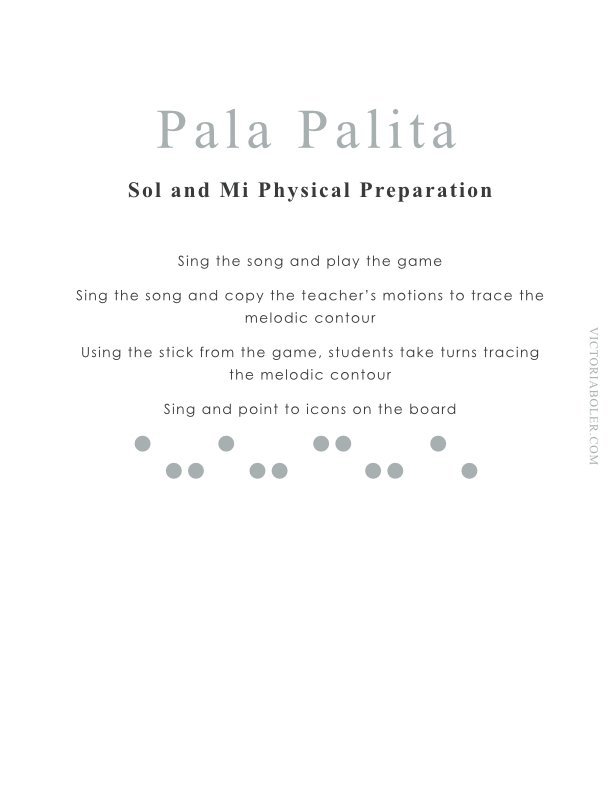
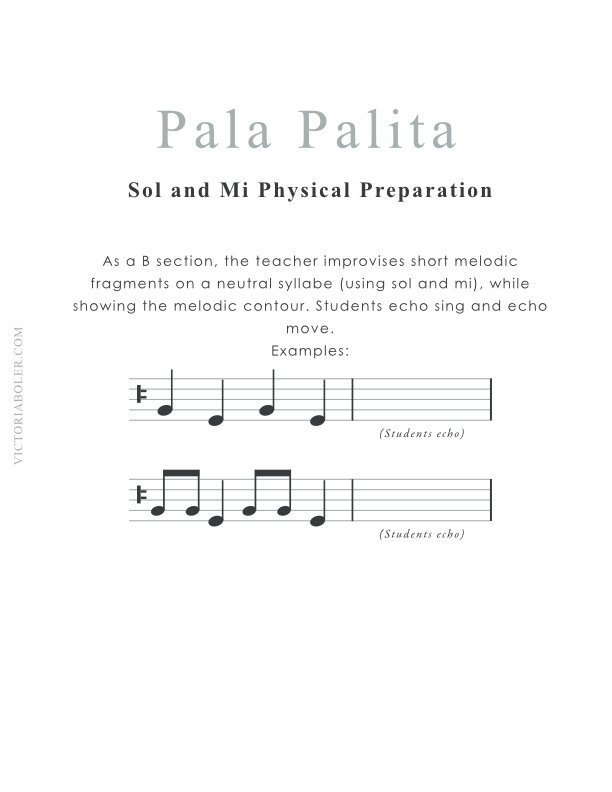
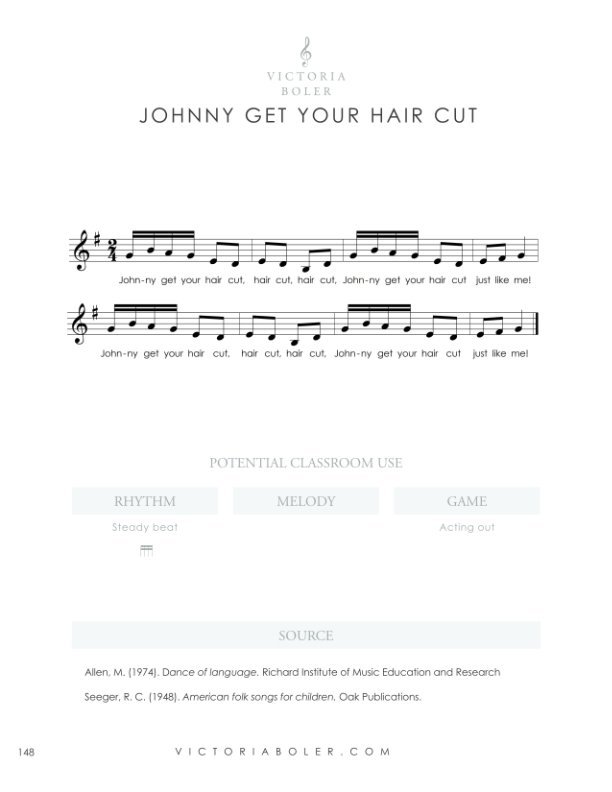
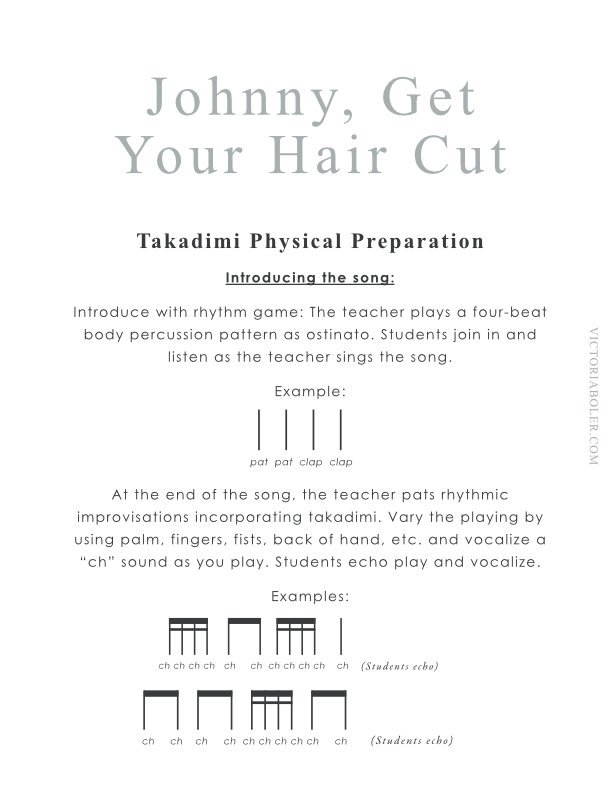
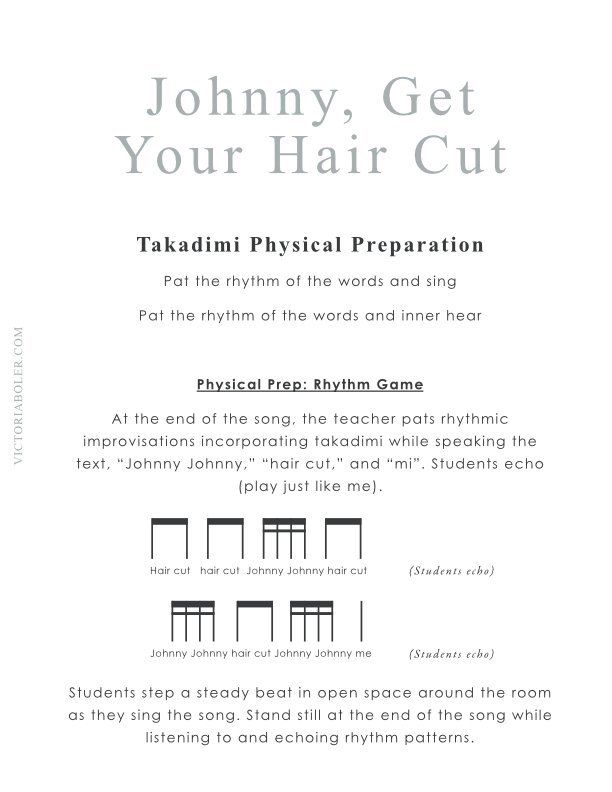
Embodying Music
Today we’ve looked at several ways to facilitate musical preparation from a tactile standpoint.
This emphasis on physical preparation gives learners access to their own bodies as their primary way of musical knowing. It is a uniquely human way of knowing music, with primary experiences happening in human bodies in community - not exclusively through Western notation. Through this learning pathway students explore how music feels and can be experienced.
References & Further Reading:
Brumfield, S. (2014). First, we sing!: Kodály-inspired teaching for the music classroom. Hal Leonard Corporation.
Choksy, L. (2000). The KODÁLY method I: Comprehensive music education. Prentice Hall.
Eisen, A., & Robertson, L. (2010). An American methodology: An inclusive approach to musical literacy. Sneaky Snake Publications.
Houlahan Mícheál, & Tacka, P. (2015). Kodály today: A cognitive approach to elementary music education. Oxford University Press.
11 January 2023, 8:21 pm - Embedding Rhythmic Improvisation into the Elementary Music Warm Up Routine
One of the main barriers to including creative processes in elementary general music is that there never seems to be enough time!
Despite the fact that most music teachers say they value the creative arts, the reality of teaching music is that there is limited time in a lesson, and limited lessons in a year. We spend our time in active music rooms joyfully singing, playing, speaking, moving, reading, writing. It can sometimes feel as though creative processes are one more thing to cram into an already-full lesson block.
In this podcast episode, Anne Mileski and I talked about the value of using the warm up routine to set the tone for music class. If we feel that community and creativity are priorities for us, a beautiful way to incorporate them is in the warm up routine itself.
Let’s look at some structures for including improvisation in the warm up routine for elementary general music. We’ll focus on two songs from this post and imagine some ways to improvise with a rhythmic focus.
Let’s jump in.

The Songs
For these activities, we’ll focus on possibilities with two pieces of repertoire for lower grades: “Engine Engine Number Nine” and “One Two Three.” You can find more about them in this post.

In upper grades we’ll use the song, “Sunday Best” by Surfaces.
Rhythm Improvisation in the Warm Up Routine
Rhythm improvisation is a great starting point for students who are new to improvisation! If this is new territory for your campus, consider starting the process of with rhythm improvisation while continuing to echo vocal patterns.
Here are a few ideas to get started.
Engine Engine Number Nine

Potential Grades: Kinder - 2nd
This rhyme is well-loved in many music rooms for its versatility! For all these activities, students walk into the room speaking the rhyme in a line.
Imitation:
When all students are inside the music room, the teacher makes train sound rhythms and students echo.
Examples:


Exploration:
In a later class, students might have the option of echoing train sounds or creating their own train sounds that are different.
T: I think I hear another train coming by! My train said “chhh ch-ch ch-ch chhh” and I heard the other train say something different: “ch-ch ch-ch chhh chhh.”
Students choose if they’ll continue to stay on the teacher’s train and make the same train sounds, or if they’ll move to a different train and improvise their own train rhythms. During this portion of the improvisation sequence, listen for the length of students’ improvisations. They should match the length of the given four-beat pattern. This awareness of phrase length will tell us when it’s time to move on to the next step.
Example:

Improvisation:
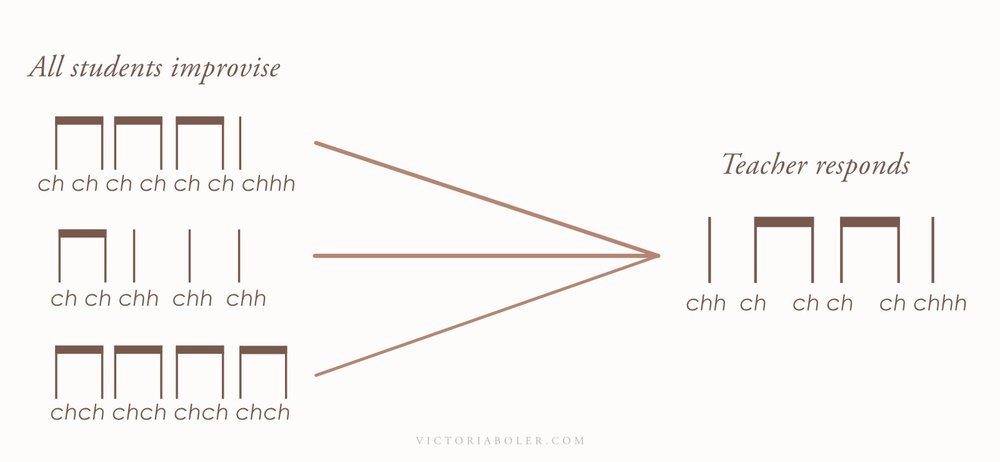
After several experiences having the option to improvise or echo, all students are asked to improvise.
When students are ready, they improvise the first train and the teacher improvises a second train. In a later class, the teacher can divide the class in half.

Eventually, group train improvises the first set of train sounds and the second group improvises their train’s response.
One Two Three
Potential Grades: 2nd - 3rd

I wrote this song for The Planning Binder 2022 - 2023 school year. It’s another versatile selection that can be used for many musical ends!
Students walk in the room in a line, singing the song. Use the text of the song, “let’s clap our hands like this,” to move from imitation to improvisation over the course of several lessons.
Imitation:

Sing the song. As a B section, the teacher claps four-beat or eight-beat rhythms and students echo. Over time, the teacher adds in two levels of body percussion (such as clapping and patting), and perhaps up to four levels (snapping, clapping, patting, and stamping). Students echo with the teacher’s body percussion.

As students echo patterns with two levels of body percussion, pay attention to the fluency with which they switch timbres. Watching for the ease of switching levels will inform the pacing of the progression.
Exploration:
Sing the song as students enter. As a B section, the teacher plays four-beat or eight-beat rhythms on body percussion. Students repeat the rhythm, but play it on body percussion of their choice.
Example:

In later experiences, students can have the option of playing the same rhythm, or improvising a new response.
Improvisation:
When students are ready, we’ll ask them to improvise a new rhythm instead of echoing.

This opens up several new possibilities for creative interdependence:


Ask students to improvise the musical question (the first improvisation) and the teacher responds
Divide the class in half. One half improvises first. The second half of the class picks someone to watch, then improvises their own response.
Sing the song. During the main section (one two three, walk around and follow me), students step a steady beat to find a partner. At the end of the song students play their rhythm improvisations in question and answer form. Repeat the same activity as students walk to a new partner.
Sunday Best Rhythm Improvisation
Potential Grades: 3rd - 5th
Especially for older students who have not had previous classroom improvisation experience, it can be helpful to start the improvisation process with rhythm (through speech and / or body percussion) and then moving to vocal improvisation.
This process will be similar to the one for One Two Three.
Students enter the room playing a body percussion pattern as the song plays.
Imitation:
The teacher plays a few patterns on body percussion and students echo. Depending on the age, the place in the year, and the curricular sequence, consider incorporating target rhythms into the echo patterns.
Consider starting with two levels of body percussion and gradually increasing to four (snapping, clapping, patting, and stamping). Pay attention to the fluency with which students move from levels of body percussion. This gives important information about when to add levels of complexity with the body percussion patterns.
Examples with target element, syncop-pa:


Exploration
Students will likely be ready to move to exploration after a few experiences using imitation. In these exploration activities, the teacher plays a body percussion rhythm. Students echo the same rhythm on body percussion of their choice.
Students can also have the option of improvising their own rhythm response that is different than the teacher’s. During these experiences, listen for the length of student responses. If responses match the eight-beats of the teacher’s improvisation, that’s a great sign that students are ready to move on to improvisation.
Examples with target element, syncop-pa:

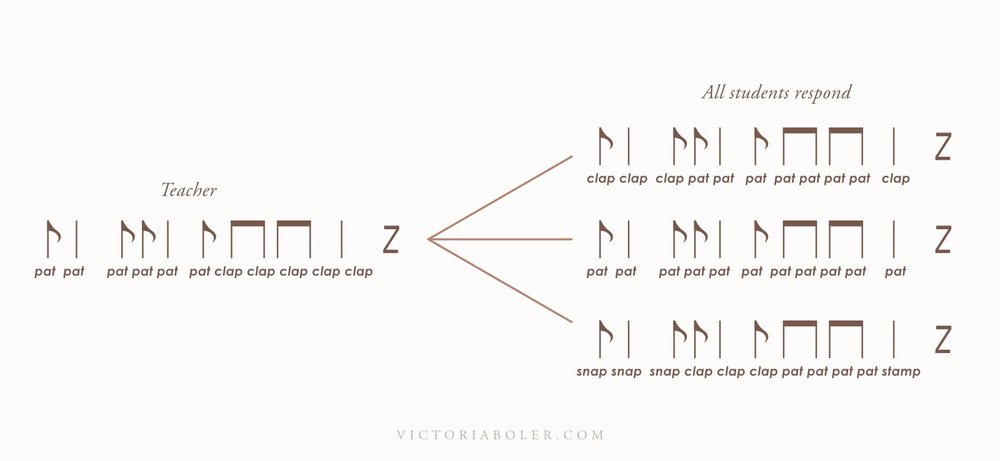
Improvisation:

When we hear that students are ready, we’ll ask everyone to improvise a new response that is different from ours.

From there, students improvise the rhythmic question and the teacher improvises a rhythmic answer.
This is another time to check that the length of students’ improvisations matches the phrase form set in previous classes.
As students become more comfortable with rhythm improvisation, we can expand the activity directions to increase the level of musical interdependence. Here are a few options:

Divide the class in half. One half improvises first. The second half of the class picks someone to watch, then improvises their own response.
Students turn to a shoulder partner. One musician improvises the first eight beats and the other musician improvises the response. Find a new partner and repeat.
Pairs of students combine to create a group of four. Each musician improvises eight beats, taking turns going around the circle. After that, groups of four combine to create a group of eight. Each musician improvises eight beats, taking turns going around the circle. Groups of eight combine with the whole class to continue the warm up routine.
Students improvise both the musical question and the musical answer on their own.
For groups who are ready for a challenge, invite them to try using part of their partner’s musical material in their response.
What’s Next?
I love incorporating improvisation into each class at the very beginning to set the tone of interdependent creativity.
The beauty if starting with rhythmic improvisation is that it is so accessible! If you’re looking for a way to ensure that improvisation is a part of every music class experience, consider trying some of these ideas.
In the next post we’ll explore some possible ways to build off of rhythmic improvisation into vocal creativity.
8 November 2022, 11:04 am - More Episodes? Get the App
Your feedback is valuable to us. Should you encounter any bugs, glitches, lack of functionality or other problems, please email us on [email protected] or join Moon.FM Telegram Group where you can talk directly to the dev team who are happy to answer any queries.
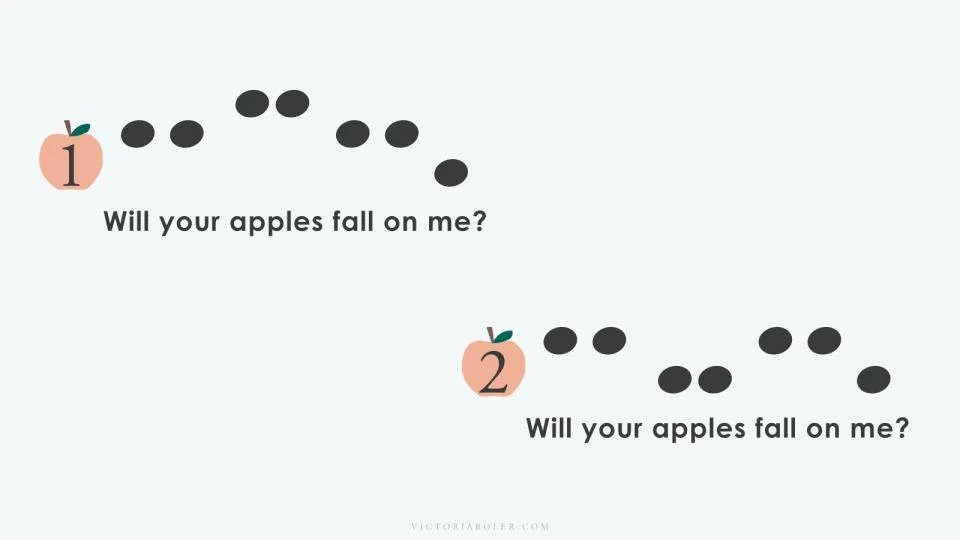
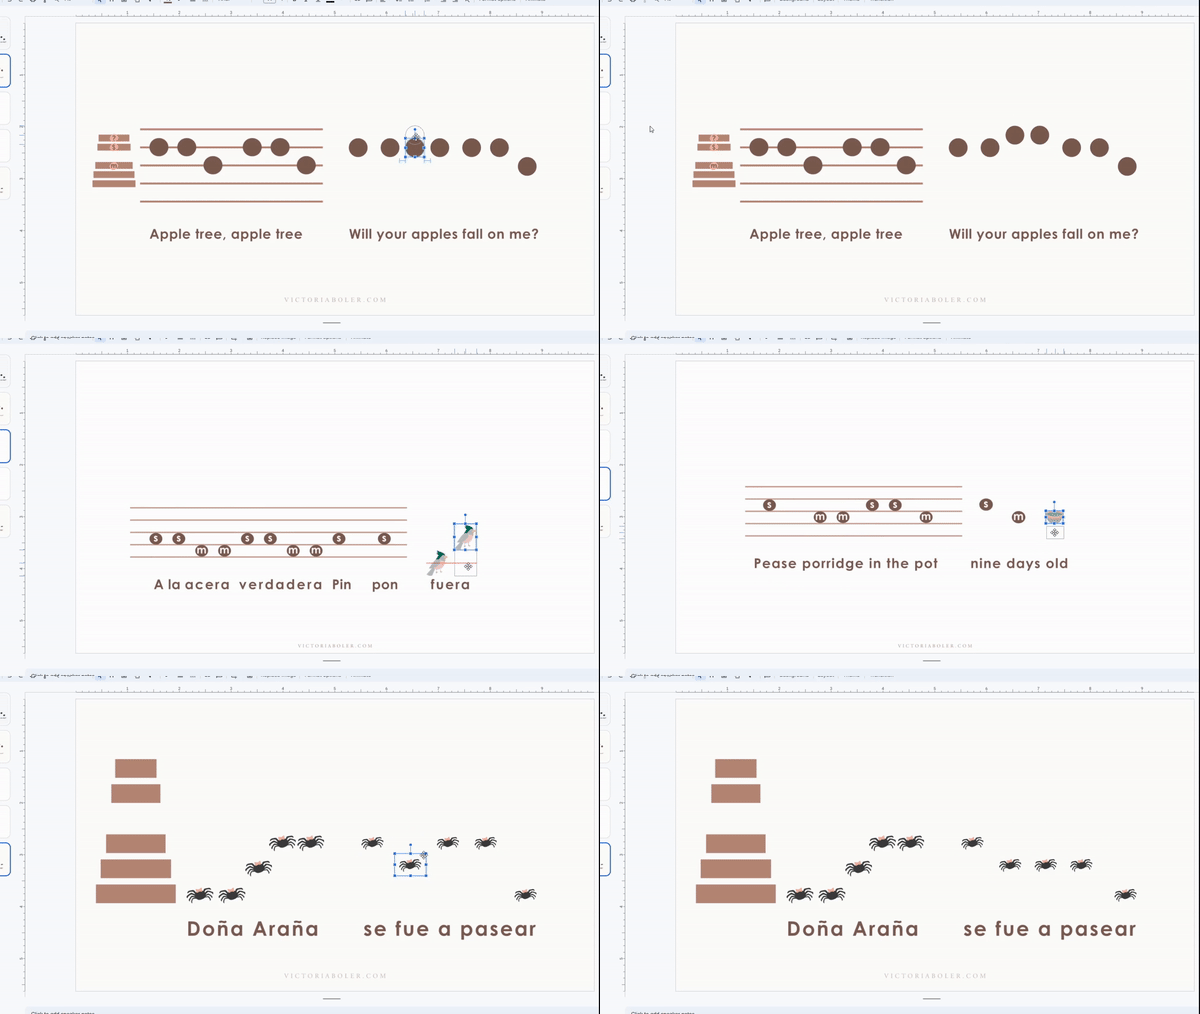
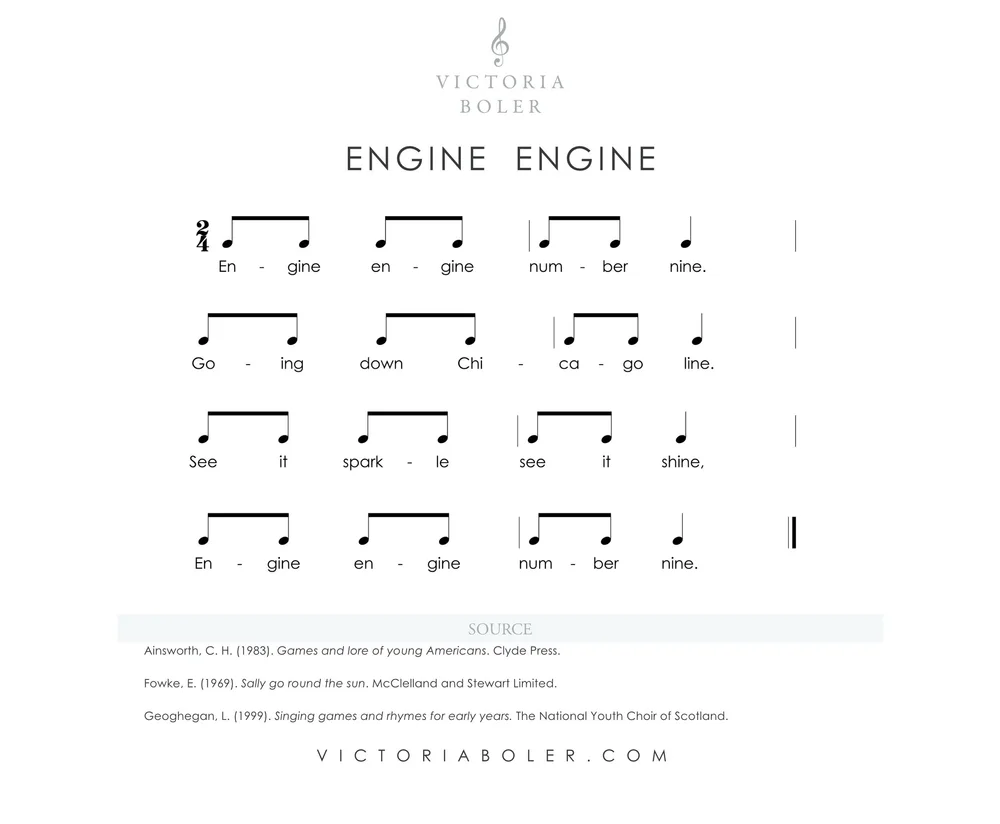
 Music Education Podcast with Jessica Peresta of The Domestic Musician
 Choir Baton
 Afternoon Ti
 Read Me Another
 Chaotic Harmony